DC-to-DC power supplies for PCs Power supply solutions using a DC-to-DC adaptor have been around for a while, but traditionally they were used mainly in Mini-ITX cases and car PCs. I have been pondering the idea of using this in a SFF PC since a fellow SPCR forum member "lm" posted such an idea over a year ago. However articles, reviews, and even fellow user experiences remained scarce, and it wasn't clear how well they would work in a desktop system. On top of that they weren't readily available and cost more than good quality ATX power supplies.
However after my good experience with the ASUS Pundit's external power supply setup, allowing it to run virtually silent, I decided it was time to step up and give these DC/DC adaptors a try.
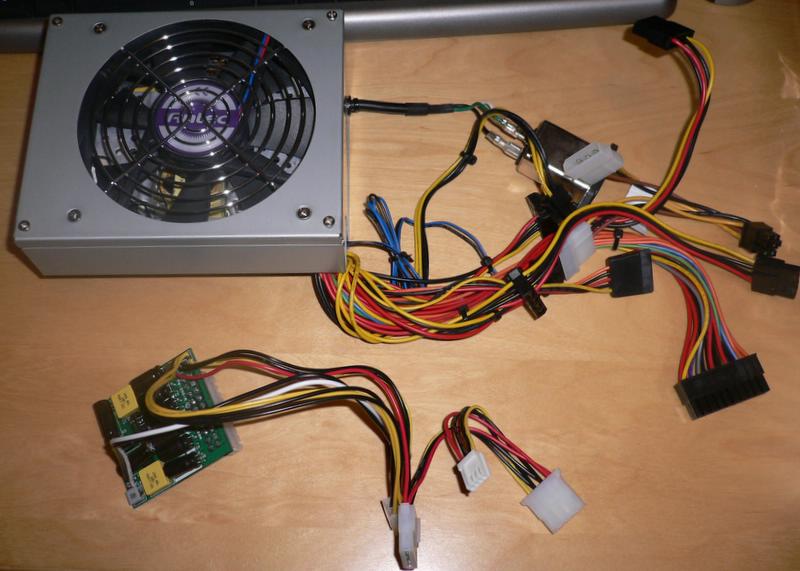
The Pico PSU and the PW200M are both DC/DC adaptors that come integrated on a small circuit board and can be plugged into practically any motherboard that utilizes a 20 pin ATX connector. These boards do need to be paired with an external "brick" AC/DC adaptor.
Let's have a quick look at these first...

Here is the Pico PSU. Yes that is the complete DC/DC adaptor. That's all that needs to go inside the PC.
 It is indeed very tiny and the "Pico" name is well earned. It's not much larger than just the motherboard connector of a normal ATX power supply!!
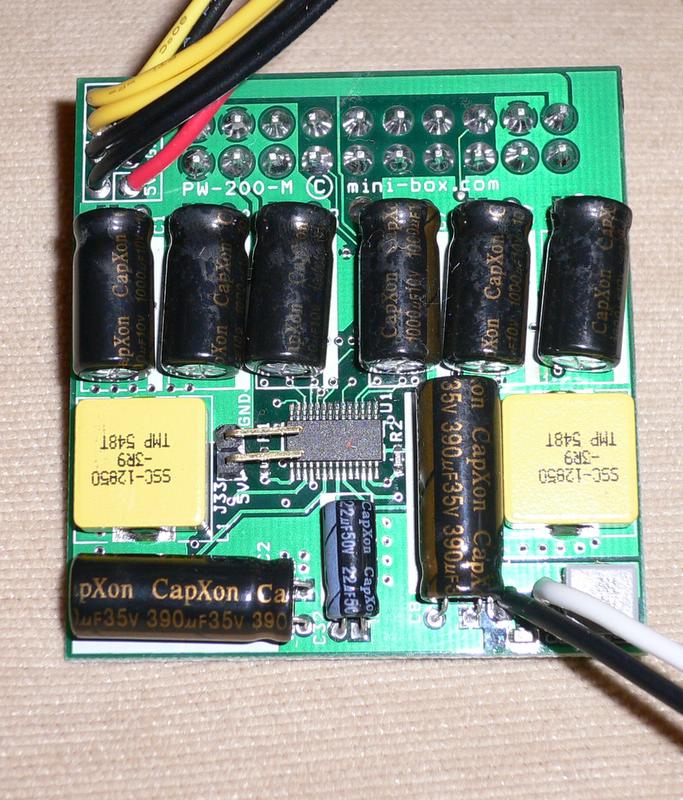
 And here is it's older brother, the PW200M. These are two seperate and independent DC/DC adaptors. The PW200M is slightly larger, but still very compact. We'll discuss their differences later.
 In case the molex connectors don't give you a good enough idea about it's size, here they have their photo taken with a traditional ATX sized power supply.
So why would anyone want to install one of these inside their PC instead of a normal ATX power supply? Well of course we mean someone who wants a Small and Quiet PC...
1) Both the AC/DC as well as the DC/DC adaptors can be fanless, meaning they generate no noise.
2) In general such a setup will be more energy efficient especially at low power consumption levels where most silent-oriented PCs will tend to be. This also means the less energy that is wasted, the less heat that will be created. This should mean the system does not need as much cooling and fans can be run quieter.
3) The DC/DC conversion part should be more efficient compared with the AC/DC conversion, which also means most of the heat generated will be outside of the system again reducing the amount of cooling required inside the system. The claimed efficiency of the PicoPSU and PW200M is "greater than 95% at full load" whereas even the highest quality ATX PSU is rarely able to boast more than 85% (please note though, 95% only applies at full load and the AC/DC efficiency must also be considered when talking about overall efficiency).
4) With their tiny size, they only take up minimal space inside the PC. This becomes important for Small Form Factor PCs where space is already so tight and often airflow is not so good. Poor airflow will mean fans have to work harder. Removing the stock PSU should allow for much better exhausting of heat, keeping overall system cooler which again should allow it to run quieter.
So what's the catch, why aren't these setups more widely used? Well besides the ASUS Pundit P2-AE2 and the Mac Mini, there are actually other barebones/SFF that come with this type of setup. Shuttle has their Zen ST62K and more recent SD11G5, both very quiet SFF. Dell also runs their Optiplex ultra-small-form-factors like the SX260/270/280 or their current GX620 to name a few. ECS also did the same with their EZ-Buddie. However none of these manufacturers or other major brand are offering any DIY solutions you can apply to your home PC. Some minuses to consider.
1) Most people would choose to have their PC in one package and no external brick sitting on the floor.
2) Most of these DC/DC adaptors tend to be limited in wattage, 120W for the Pico and 200W for the PW200M. I am not aware of any larger DC/DC adaptor readily available. Whereas for ATX PSUs these are commonly in the 300-600W range, and some even going up to 1KW (in case you need to power all the PCs in your neighborhood :)
However what you can power with 120W or even 200W may surprise some of you; more on that later.
3) There is limited availability and costs tend to be higher. I was only able to find them in specialty Mini-ITX/Car PC retailers or otherwise resort to eBay. The Pico is generally priced around $45 and the PW200M can be found for $40. However adding in the AC/DC adaptor, depending on the wattage and where you get it from, could add another $35-80. Unlike lower wattage AC/DC bricks, high wattage bricks are a lot less common, especially ones that supply the 12v required by these two DC/DC boards. This compared to a high quality quiet ATX PSU like the Seasonic S12 330W which is sold for around $60.
4) Possibly other issues of electrical noise, durability?
Frankly for a regular sized PC, it's hard to justify the external PSU solution over a high quality quiet ATX PSU which can run very quietly with good airflow. For a SFF system however, the external PSU should have significant advantages... let's find out...
A CLOSER LOOK


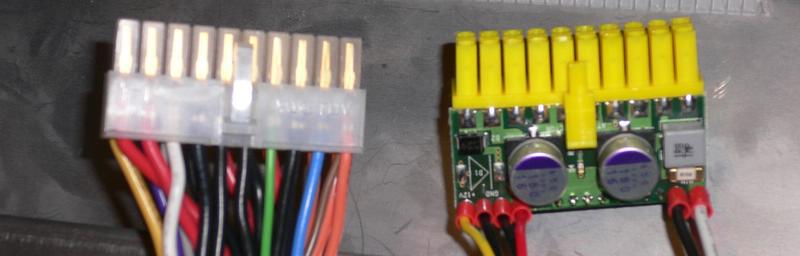
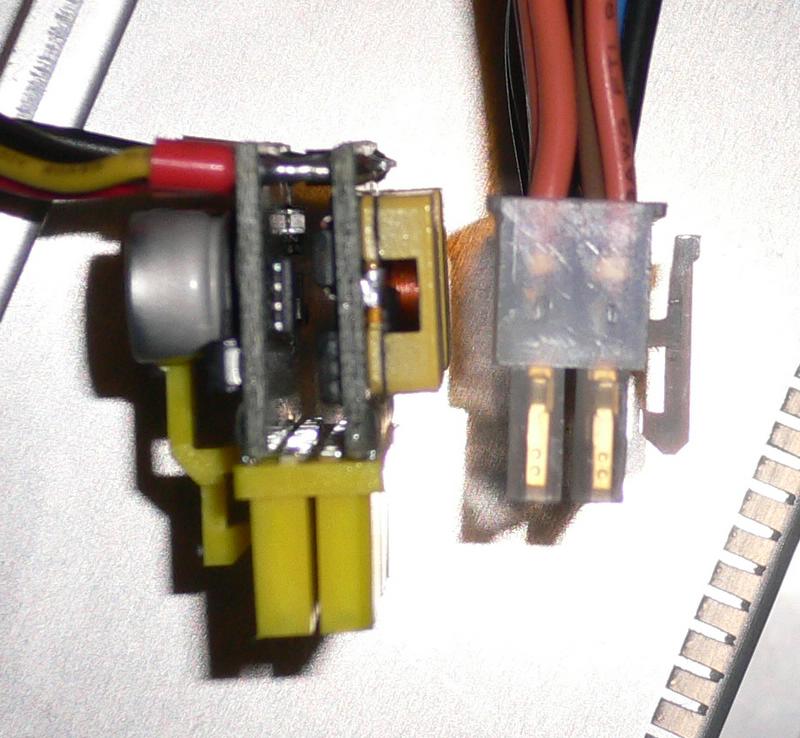
Here is a closeup of the Pico PSU. The black and white wires is the 12v DC input. The other set of four wires provides the 12v/5v to the P4, molex, and floppy power connectors.
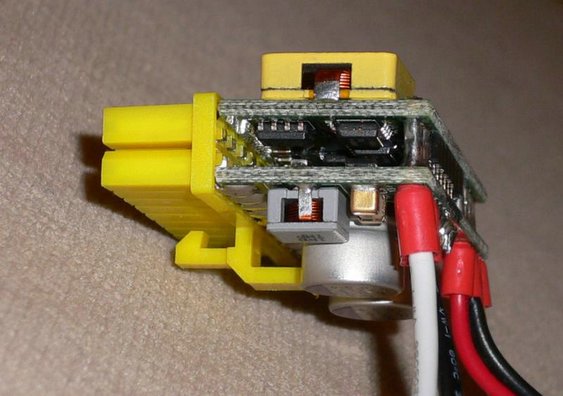
The two yellow squares and the tiny grey one on the back are metallic casings, possibly for isolating electric noise assuming this is a switched mode convertor, or to serve as a heatsink for dissipating heat? Again any engineers reading this are welcome to enlighten us by adding your comments.
From the side we see that the Pico is made of two double-sided circuit boards sandwiched together. Some ICs can be seen in between.
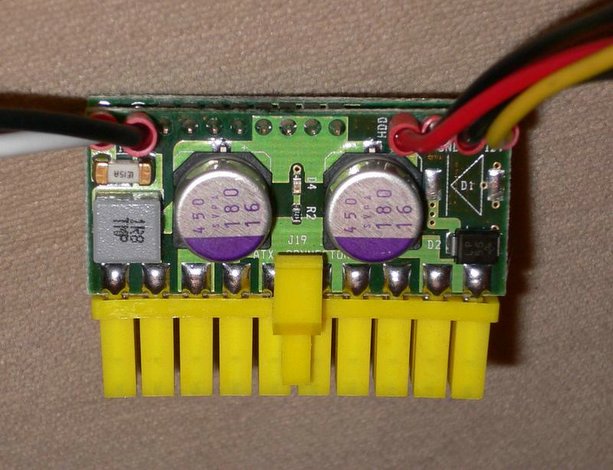
 Here is the back side of the PW200M where it has the same three square metallic casings. In addition we see a series of capacitors not found on the Pico (CapXon 390uf 35v and 1000uf 10v).
A SMALL HICCUP
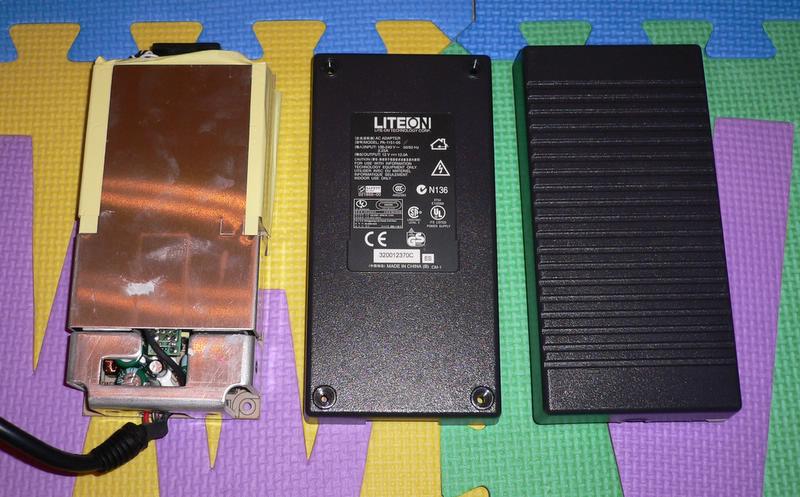
 Here is the external brick AC/DC adaptor that I ordered with the Pico PSU. It's rated output is 12v / 8.5A which is 102W, but it claims a maximum 110W and was the largest wattage brick available from the store where I placed my order. Unfortunately it arrived defective. When I plugged it into the AC outlet, it immediately started ticking and the LED began pulsating. Measuring the output voltage showed a cyclic fluctuation from 10.2-12.2v.
The international freight cost was about the same as the cost of the adaptor so it really made no sense to return it for a replacement. I tried to see if it could be repaired locally, but unfortunately in our everything is disposable society, I couldn't find anywhere that repairs AC/DC adaptors. Manufacturing costs have come down so much that the replacement cost is less than the labor cost to repair it... My own attempts to repair it were thwarted as I couldn't even get the case open despite having removed all screws and trying to pry open the seams.
Well I'll say again, high wattage 12v adaptors are extremely hard to find. Replacement AC/DC adaptors are plentiful for notebooks, but these usually stay below 80W, and for the higher wattage adaptors that I did find, were usally more than 17-19v. In the end I found a second hand Lite-On brick rated at 12V 12.5A (150W) for a pricey $50. Anxious to test out my DC/DC adaptors, I bit my lip and took out my wallet.
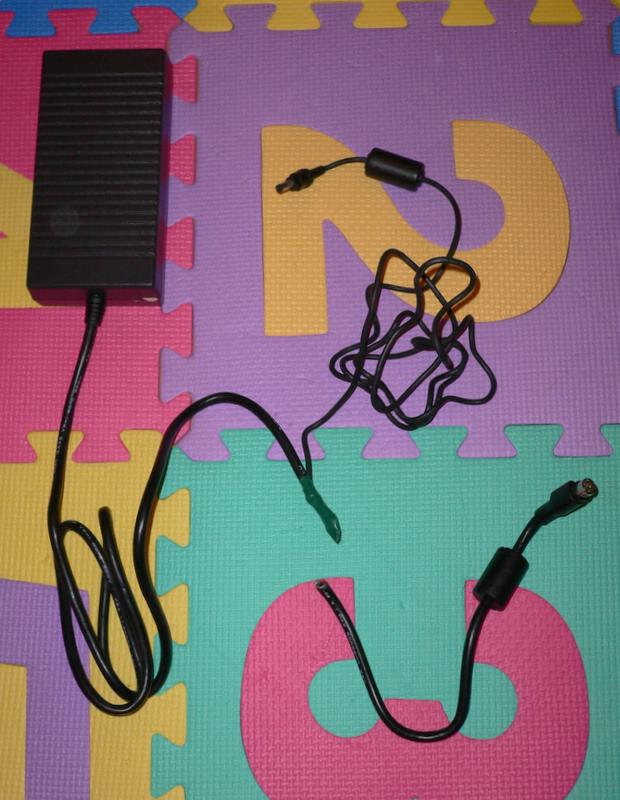
 Both DC/DC adaptors have a simple round 5mm DC input connector with a + and - connection. Unfortunately the LiteOn brick had a 4 pin din plug. I had no luck trying to find the pin out on the internet for this adaptor, but it seemed that some video equipment used a similar power connection. Then I read some AC/DC adaptors actually output two seperate rails, maybe that was the reason for 4 pins instead of just a simple two? This never occurred to me before, but if the 150W were split on two rails, then just taking one rail might leave me with 75W or less, which would not be enough power for the PC I was planning. So opening up the brick was in order, that plus I hadn't the slightest clue regarding the pin out.

Please remember opening up any electronic equipment especially power supplies can be dangerous even if it is unplugged there may still be residual charges. Having said that, the LiteOn brick opened up easily after the four screws were removed.
 Fortunately my fear about seperate rails was unfounded; here we can see the red and white wires are soldered together to one connection, with the black, brown, and shielding wire soldered together to another connection.
 The solder points can be seen better from the underside.
Ok let's put back together the brick and start splicing the wires.

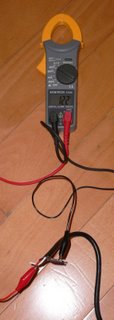 Hurray a 12.2V reading! A quick check with the voltmeter reconfirms our understanding is correct. The red and white wires both correspond to +12v and the black, brown, shielding wires to ground (please be careful that other models/manufacturers could be wired/colored differently).
Off comes the old head and we splice in a round 5mm connector salvaged off some dead brick at the same second hand store.

 No soldering yet, just some electricians tape for now so we can get to testing. Notice how much thicker the wire is coming from the LiteOn brick, I plan to purchase a connector and solder it on directly later, but for testing this should not be a problem.
TESTING
 Finally we get to hook up the Pico PSU with a 12V input! A green LED on the front lights up to let you know it's receiving power.
 Using a paper clip to simulate the PC ON switch by shorting the ATX connector's PowerOn pin. A nice little red LED on the back let's you know you have powered on.
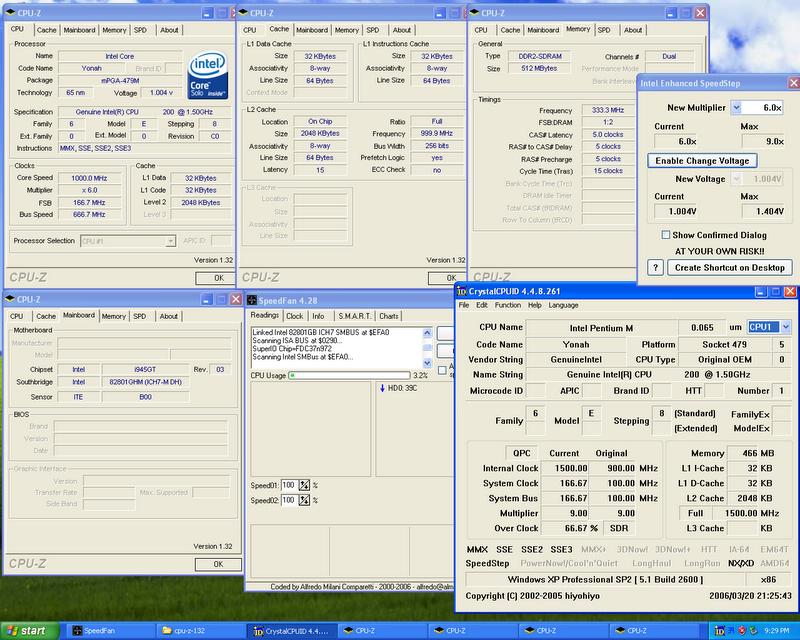
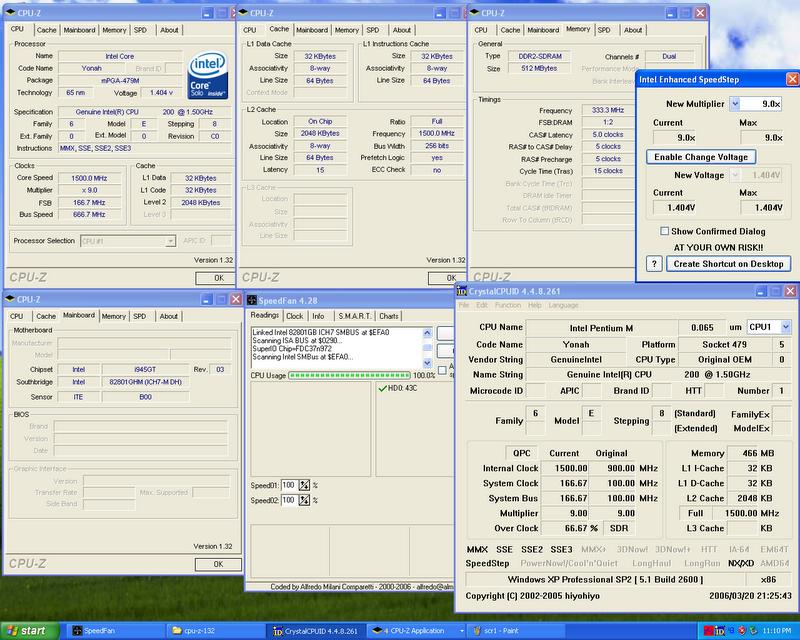
Without any load, checking the various rails all seemed quite reasonable. The -12v was a little loose, but probably still acceptable.
Pico PSU (12.2v, 5.0v, 3.3v, -13.3v)
PW200M (12.2v, 4.9v, 3.25v, -14.3v)
I was however getting a very odd reading when the DC/DC boards were in power off mode. The 12v rail was reading 3.2v-4.5v instead of the expected 0v. This had me concerned and a little hesitant to test them in a real system. Maybe this was only very minor current leaking through (as the 12v rail is actually passed in from the 12v input)? Well I did have an old system I was ready to give away and wouldn't cry (not too much anyways) if something happened to it. Specs:
Athlon XP-M 2600+
ASUS A7V333
256MB DDR333 RAM
120GB Hitachi 7200RPM 3.5" HDD
GeForce Ti4200 VGA card
 First let's check the system power draw using a regular ATX power supply. Unfortunately my Seasonic PSUs (which SPCR has tested efficiency curves) were not available and I had to use a Tagan TG380-U01. The maximum AC power draw measured was 150W. The Tagan's efficiency at load if I remember correctly is only 70%, and probably 65% or less at lower loads. That would mean the equivalent of around 100W DC draw. As the Pico is rated at 120W, this might be pushing it especially when the load balancing between the different voltage rails cannot be checked. So I decided to drop the processor speed to a safer lower consumption level. Initially it was set at 12.5x166 or 2.08Ghz, dropping it to 8x166 1.3ghz gave a more comfortable peak of 130W AC/90W DC (Just a note, despite the XPM mobile processor being able to run at very low voltages, the A7V333 motherboard I used did not allow voltages lower than 1.6v hence the higher power consumption).
THE MOMENT OF TRUTH
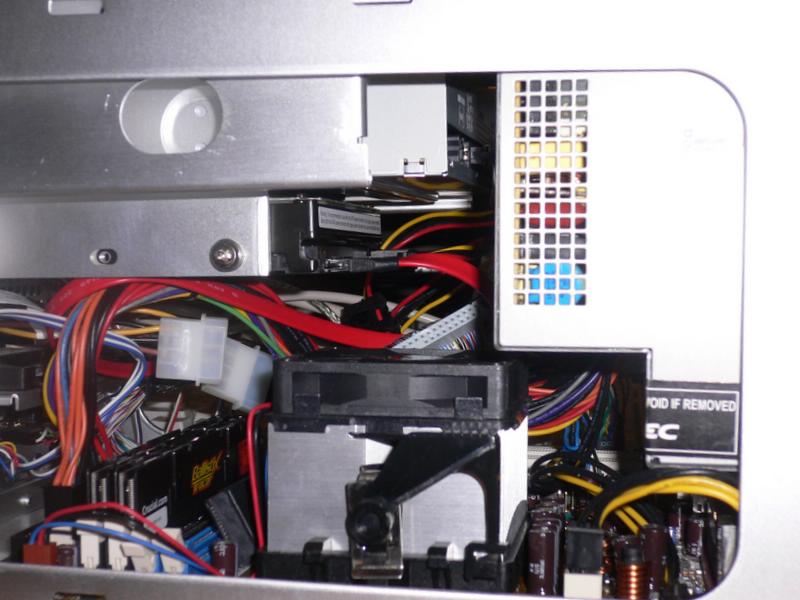
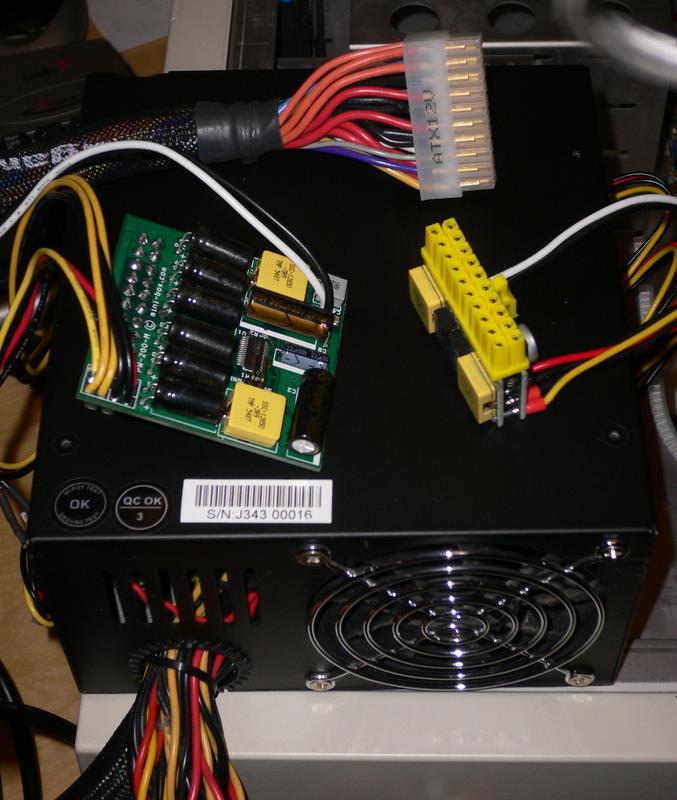
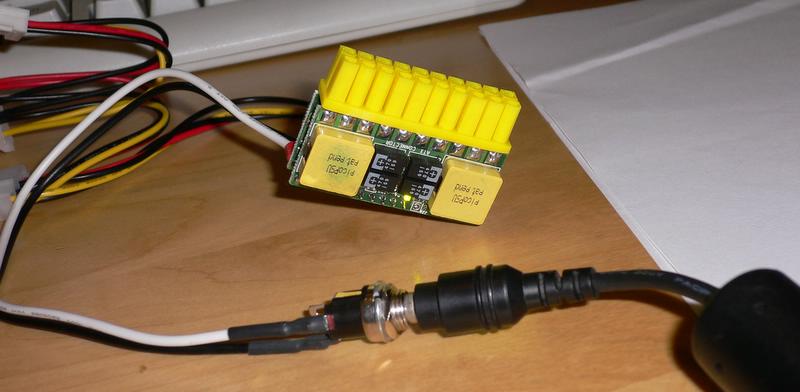
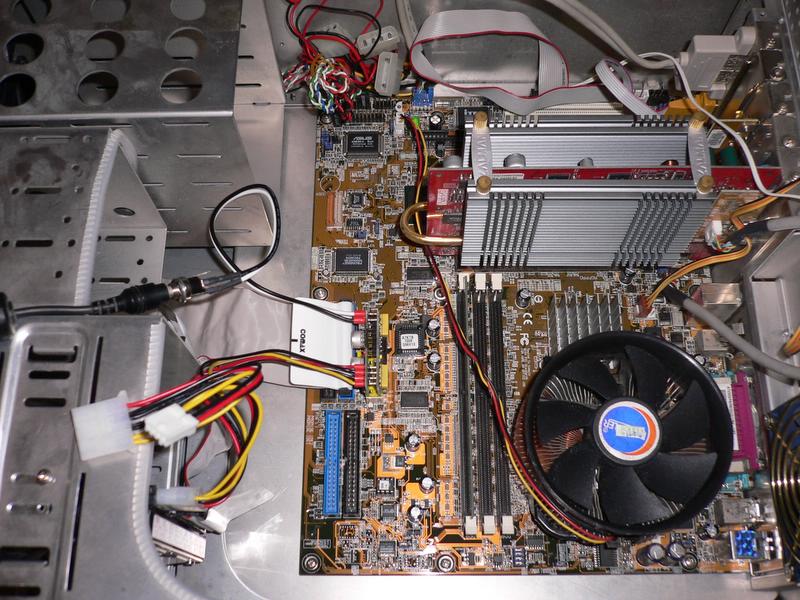
 Ok, let's start with the higher rated PW200M. It's that tiny green card located in the middle of the photo. It's probably clearer in the closeup.

There was no problem fitting this board directly onto the ATX power connector of the motherboard. However it should be noted that the board covers the release clip making it inaccesible for removing. Fortunately there is a tiny hole in the PW200M that allows a thin rod to be inserted down to pry open the release clip.
It was with a mixture of anxiety and excitement that I turned on the power button, but fortunately everything went smoothly and the system booted up without a hitch! This was only a first test, so nothing extensive was done. The 12/5/3.3v rails all seemed reasonable both via the voltmeter and motherboard sensors. In addition I was happy to confirm that once the PW200M was connected to motherboard, there was no more voltage measurable on the 12v rail when the system was off.
Next up was the Pico PSU. Here it is installed, it really is very tiny! Look Ma, no PSU!


No issues here either, the system seemed to run normally during the 20-30 minutes of my testing.
INITIAL USE IMPRESSIONS
So far there didn't seem to be any stability issues, but of course the system was not run for too long. Both the Pico PSU and PW200M do get quite hot however. Within a minute of powering up, the square metallic casings get burning hot to touch, and after 20-30 minutes of use, the overall adaptor is too hot to grip for unplugging. As these are often used in fanless or low airflow Mini-ITX systems, I suspect it should not be an issue and the specs rate operating temperature up to 85C.
Overall power efficiency is better than the Tagan ATX power supply by 15-20% based on the measured AC draw. If our guesstimate of the 65% is correct for the Tagan, that would mean the DC/DC+AC/DC solutions are running at around 75-80% overall efficiency.
State------Tagan....PW200M....PicoPSU
IDLE-----108W.........88W..........90W
Prim95--124W........106W........108W
WHAT'S NEXT
Well the next step is to put them into their intended small form factors for some real testing. How much will they improve a SFF based on noise, temperature, and energy efficiency? Also how much can these DC/DC boards really power, and will they endure such use?
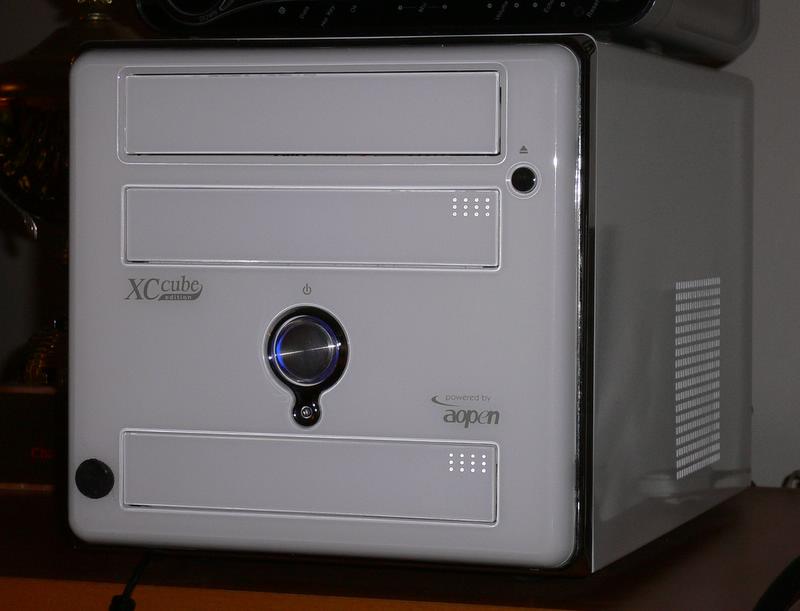
 The PicoPSU is intended for my slightly dated HTPC. It's an AOpen XC Cube EZ18, running an undervolted XPM 2200+ chip, 1G RAM, nforce2 board with onboard VGA, 2.5" HDD, and a combo-optical drive. The maximum AC draw was only 87W last time I checked, so the Pico should be able to handle it comfortably.

And for the PW200M, how about an Antec Aria SFF case with an Athlon 3500+ Socket 939 CPU, 1G RAM, Asus A8NVM-CSM Nforce 6150 motherboard with onboard VGA, 250GB 7200RPM 3.5" HDD, a DVD optical drive, and let's add a 7800GT high end VGA card.
No I'm not kidding, even with the 7800GT (not pictured here) the maximum AC draw running Prime95 together with 3DMark is 183W. Assuming the Antec PSU is running at 75% efficiency, we're looking at less than 140W DC.
SilentPCReview did a detailed analysis of various systems' loading on their PSUs and a very similarly speced system running a more power hungry 6800GT measured a total DC power draw of 125W under CPU load (no 3D loading). As the article points out, most of the loading is on the 12v rail, which they measured at 7.8A. The PW200M's 12v rail is rated at max load of 12A with a peak load of 13.5A. With my 7800GT the difference in total AC draw between CPU load (no 3D) and CPU+3D load is about 52W, and if we assume this is all on the 12v rail, even at 80% efficiency this translates to 3.3A + 7.8A = 11.1A still within the rated 12A. However whether or not running a system so close to it's limits is wise or not is another matter.
Only time (and testing) will tell...
Also I need to get a second AC/DC adaptor, and preferably one close to 200W. So far I've only managed to find the 220W Delta 12V brick used in Shuttle's SD11G5, but with a $90 price tag, I'm still searching for other options.

I will post back after I've had a chance to run these PSUs more...
NOTE: For the defective AC/DC adaptor, upon notifying the online store they offered to immediately send me a replacement. However as the two-way international freight cost would be more than the adaptor's retail price, I figured I would try to get it fixed locally. Since that didn't work out, the store issued me a full refund on their own initiative without asking me to send back the defective brick. I do not have any affiliation with this store (other than having placed on order from them), but would like to add that their customer service has been very professional; they responded quickly to all my questions pre and post sales, shipment was sent immediately upon payment on the exact date they informed me (a Saturday), and resolved the defective item in a more than satisfactory manner. Thank you Carl at www.short-circuit.com .
Goto PW200M installed
Goto PicoPSU Installed
Read more!


 Let's compare the Aria's PSU to the PW200M. You can see a significant size reduction.
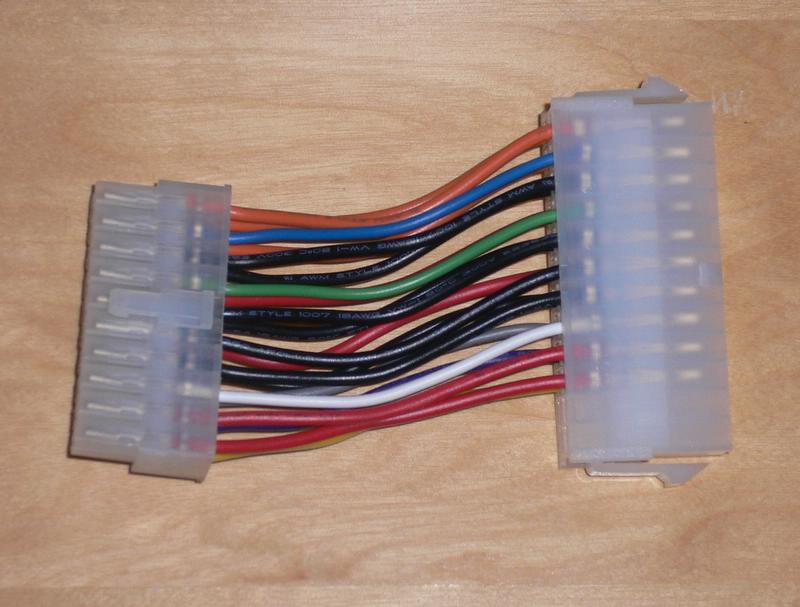 The layout of the ASUS A8NVM-CSM motherboard, had the RAM slots right next to ATX power plug, so an extension cable was used to install the PW200M up away from the board. This was actually an unused 24-20 pin convertor that came with a Seasonic power supply.
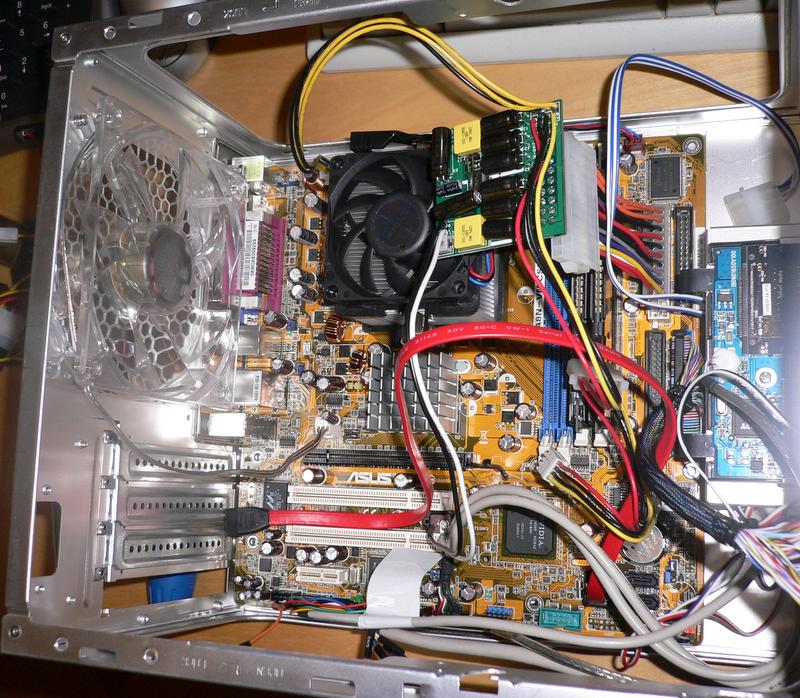
 It installed easily and without issue. Here the PW200M is suspended only by the wires, but just for testing. I made sure it was not in contact with anything before powering on. I also added a 120mm fan where the old PSU was to provide some case airflow.
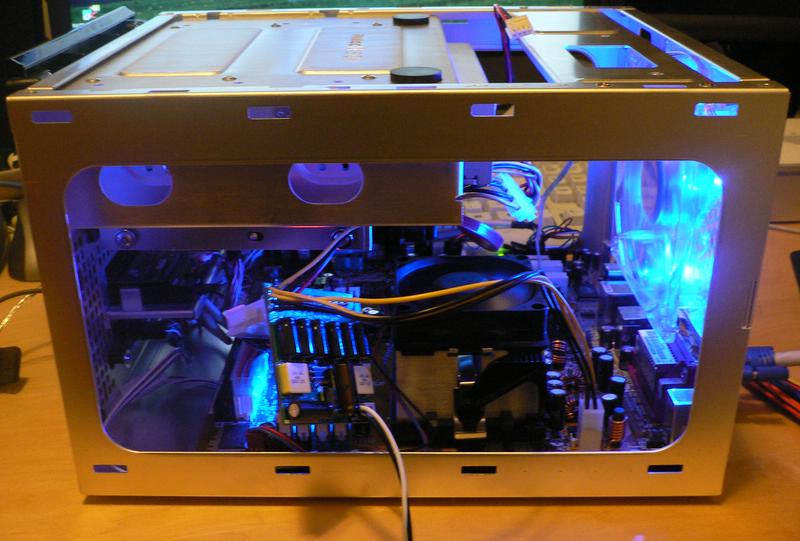
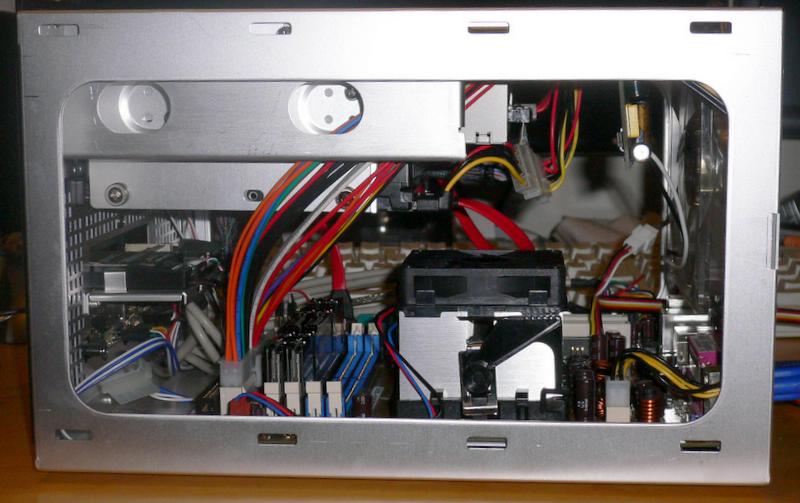
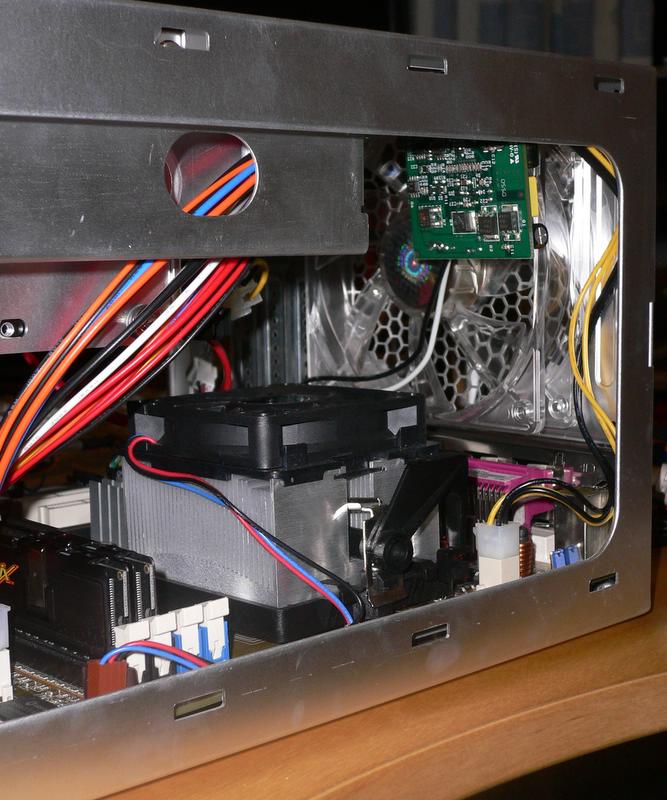 I decided to fix the PW200M towards the rear of the case in the spot of the old PSU. There was the most space here, plus I figured the extra airflow from the 120mm fan wouldn't hurt. This required a longer ATX extension cable, which I had previously purchased at a computer accessories store. I made sure that the PW200M was secure and did not contact any other areas of the case.
 This was done with some handy (recycled) twist-ties. The tie on the right is securing the ATX connector of the PW200M to the chassis, and the tie on the left just to keep the molex wires out of the way from the 120mm fan.
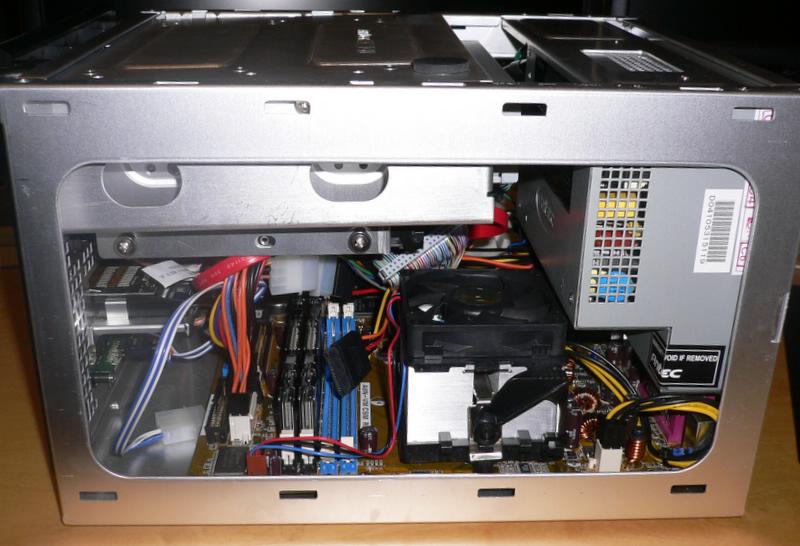


.jpg)


