PSP : Small and Silent Surfing
 Sony added an official internet browser to their Play Station Portable (PSP) back in August last year. I've had mine since the very early days of it's first release, but never got around to updating my firmware until only recently. So how well does Sony's "Portable Entertainment Revolution" (aka PSP) perform for surfing the internet, well let's find out...
BEAUTIFUL SCREEN
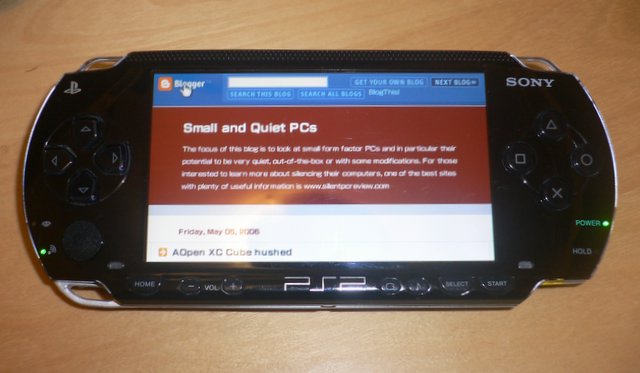
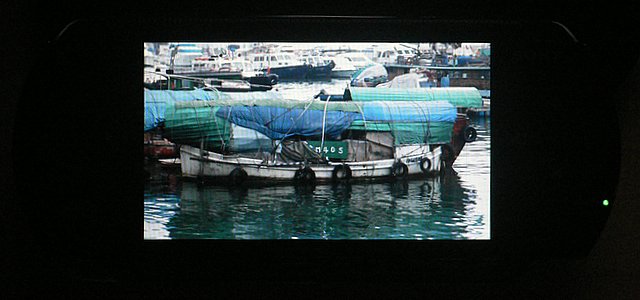 The PSP actually has a very beautiful screen that is wonderful for viewing digital photos. The back light is bright, tones are natural, and color saturation is just right.
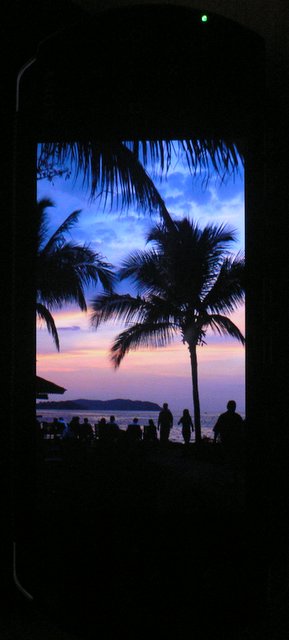 The 4.3" wide aspect 16:9 screen is actually a decent size and packs a high resolution of 480 x 272 pixels with 16.77 million colors. Those who have actually used a PSP know what I mean. Unfortunately my screen shots hardly do the PSP justice; you might notice the moire pattern appearing in many of the shots (like looking through a mesh/screen door), but this is not visible on the actual screen. It is very difficult to photograph lcd screens using a digital camera without moire (you can read more about this on Wiki).
ULTRA PORTABLE AND DECENT BATTERY LIFE
 The unit is very portable and equipped with Wifi, allowing surfing from practically anywhere where you have wireless coverage. It's much easier to bring this to the local Starbucks than a laptop (by the way in a recent trip to London I was appalled at the lack of free wireless internet access - whether as a paying customer at Starbucks, or at the London Library, a four star hotel, or Heathrow airport, only PAID wireless connections were available!).
Although it does require two hands to hold/operate, it weighs only 280 g or less than 2/3 pound. The battery life is acceptable, lasting over three hours surfing the internet and downloading podcasts with screen brightness set at maximum. Fully recharging the 1800mAh Li-Ion battery took less than 2 hours.
SILENT
 As there are no hard drives or fans, the only source of noise is the UMD (optical disc drive). Occassionaly the PSP will perform a seek if you have a UMD inside, but simply take it out and you can surf in absolute silence. Well ok, operating the keys/controls on the PSP makes a little bit of noise, but they don't click and can be pressed lightly.
USER INTERFACE
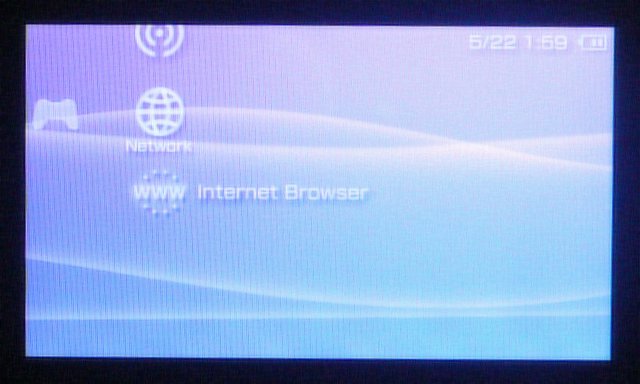
 How the web page is fitted to the screen can be set in the Display Mode option. I found Just-Fit mode worked the best where "Page width is adjusted to match screen width."
 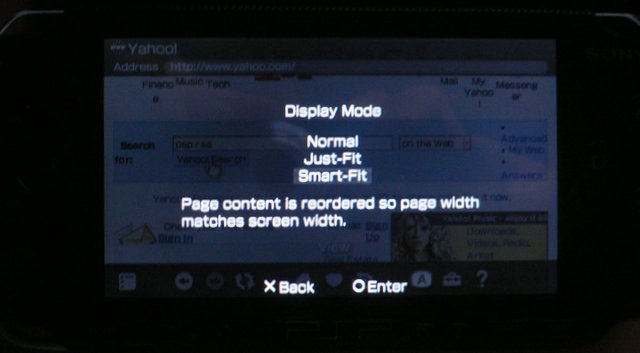 Only needing to scroll vertically makes reading pages easier.
In Smart-Fit mode, "Page content is reordered so page width matches screen width." which also means a page can be streched out very long as it tries to stack up all the frames.
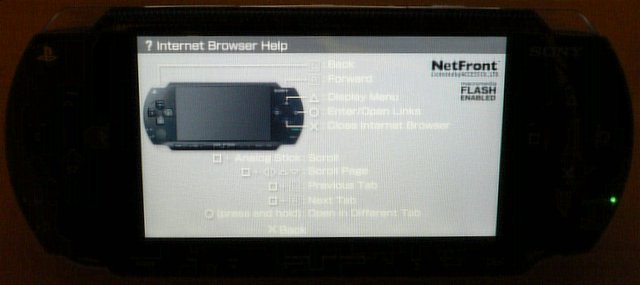 Navigating around a web page was actually quite comfortable and easy to get used to. The analog controller on the left (similar to the "eraser-head" pointers on IBM notebooks) moves the cursor around the screen. Simultaneously pressing down the (square) button on the right allows scrolling around the whole web page. Alternatively a four way cursor key on the left allows jumping around buttons/links on the page. Pressing the (circle) button on the right is the same as a left click on the mouse. One nice feature is if you hold down the button over a link, it will open the link in a new page (hey Internet Explorer should have such a handy shortcut as well, instead of the slower right-click "Open in New Window").
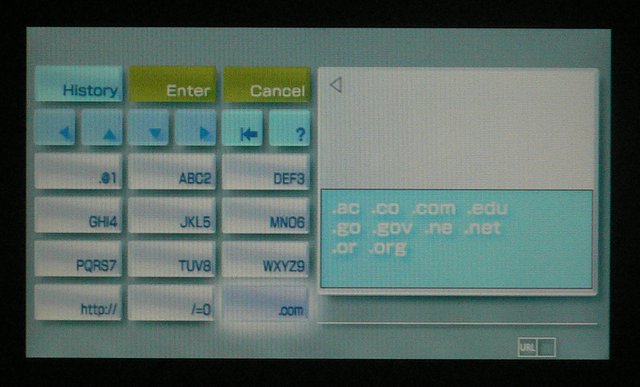 How about entering text? Well this is really where Sony drops the ball. Obviously the PSP is not meant as a text entry device, but certainly they could've come up with a much better interface. Instead they opted to copy the numeric keypad tap method used in old generation cell phones. So for example, GHI4 is grouped on one square, and JKL5 on the next. Pressing the GHI4 square once gives G, twice H, and so on. For those accustomed to sending a lot of SMS, this entry method could be usable, except there is no numeric keypad and you must use the cursor keys to scroll to the button you want to press (so if I just tapped D, I have to push DOWN-DOWN-LEFT-LEFT to reach PQRS7 and to select S click four times). There was a lot of talk of an add-on USB flip-down keyboard being developed by the company Logic3, unfortunately that was dropped with claims of lack of support from Sony. In anycase Sony could have included predictive text input (found on recent cell phones) or made better use of the analog controller and 10 plus buttons available on the PSP.
Certainly this rules out anything that requires significant amount of typing (writing/replying emails, posting to forums/blogs, chat/messenger, etc.) but it is still usable for entering addresses once (and adding them to the bookmark), account/passwords once (and using cookies to memorize them), or a quick search. Lucky there is the bookmark feature for easy calling up of a web page.
SPEED AND COMPATIBILITY
 Unfortunately there are more limitations here. Web pages do take longer to load, especially pages that require a lot of bandwidth. On the most part a little patience means browsing news sites, blogs, forums, email, and even photo sites is quite acceptable.
 If you've ever tried surfing the internet on a mobile phone, using GPRS or even 3G, that is excruciating slow. The page loading speed using the PSP is somewhere between that of 3G and a regular PC.
 Although the PSP browser now supports Macromedia Flash content, there are still pages/content that it is not compatible with. I could not get MSN to load at all (but no problems with Hotmail), and on some sites the PSP came back complaining "There is not enough memory".
 I guess PSPs 32MB system RAM is not sufficient, and it's not making good use of the memory stick. Of course any sites that require plugins or other software to be installed on your system won't work either. Hopefully with the constantly increasing size of the memory sticks (now more than 2GB available), future updates to the browser will help overcome some of these limitations.
RSS
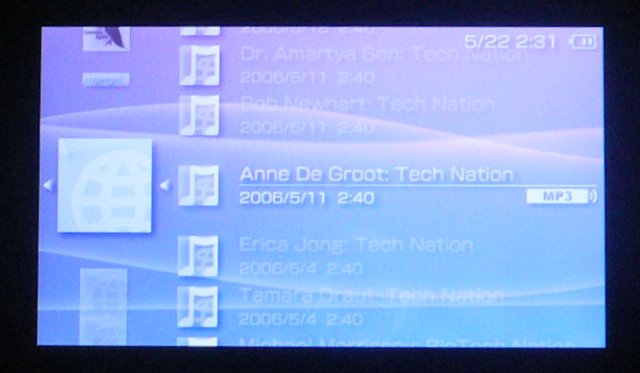
 The PSP does support RSS Channel. RSS or Real Simple Syndication allows for easy access to a summary of the content on a website (with RSS support) such as new sites, podcasts, blogs, etc. However it seems that the PSP is only supporting audio content at this time. Subscribing to an RSS feed is as simple as clicking on the website's RSS link and confirming PSP's prompt. Some sites that have audio feeds that worked with my PSP include CNN, Engadget, Tech Nation, Business Week, Nvidia Podcast, Insomnia Radio... More sites listed here on psprss.net and radio.xmlstoragesystem.com .
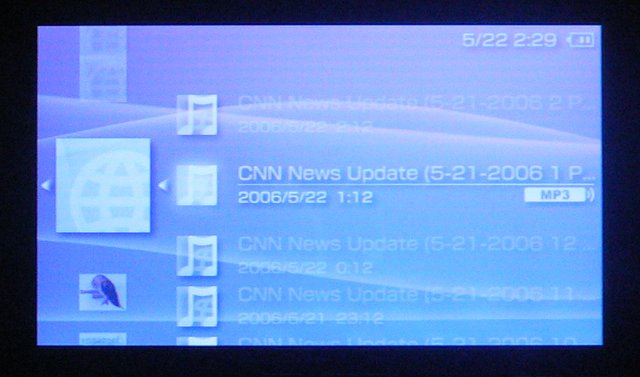
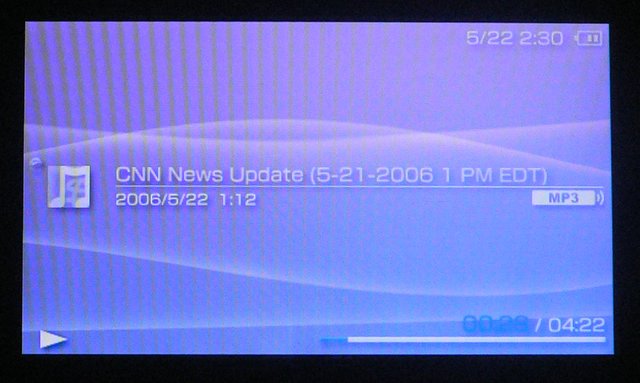 Here the PSP is playing back a podcast from CNN. After a while the screen will automatically turn off (to save batteries) while the audio will continue. An iPod might be a better solution for catching up with podcasts, especially if there are regular podcasts you follow (download by iTunes on a PC, dock your iPod for transferring, and listen at your leisure without worrying about broken/poor connection), but with PSPs wifi you have the option to browse and listen to new podcasts on the fly. The PSP built-in speaker is also quite decent if you don't want to use headphones.
CONCLUSION
 Well the PSP isn't about to replace the PC as the main browsing tool. However being completely silent, extremely portable, and having acceptable battery life plus a very nice screen of a usable size, certainly makes it a nice complementary browser for reading up on the latest news, blog posts, forums, email, even perusing photo sites. It also works nicely for quick checking of information like the weather or market data, and keeping up with podcasts. All this can be conveniently done from practically anywhere (with wireless coverage); while having breakfast in the kitchen, lying down in bed (even without disturbing a sleeping spouse or significant other), sitting on the window sill, even someplace private (fill in your private place here) where one normally wouldn't have access to the internet. It's also easy to slip into a big pocket, small backpack, or purse if you want to take it outside where you'll have access to Wifi.
Unfortunately the poor text entry interface makes it impractical for any use where you need to type more than a handful of words (such as posting to a forum, replying email, filling in online forms, etc). Also the incompatibility with some web pages and limited memory, could prove annoying. The slower loading times on the most part is not so bad unless you visit sites requiring high bandwidth or need to frequently load new pages. Compared to anyone who's tried surfing on a cell phone or PDA, this certainly would be a much better experience (although some PDAs with larger screens, wifi, and a touch screen might not be so bad either). The PSP can't match a laptop's speed, compatibility, functionality, or keyboard, but then again the PSP is priced at a tiny fraction of the cost (under $200) and is more portable with similar battery life.
There are other small and portable "multimedia" machines that offer internet browsing capabilities like Nintendo's DualScreen or Gizmondo. Certainly would be interested to hear about other's experiences with these devices as small and silent surfers.
Read more!
posted by Mstac @ 1:20 AM
0 comments
![]()
![]()


