Saturday, April 29, 2006

PicoPSU Installed

It's been a while, but finally I had the chance to install my PicoPSU into the AOpen EZ18 XC Cube SFF. The EZ18 is an old model, but the case has a nice clean and elegant glossy white finish (also comes in black) which I like very much. AOpen continues to use the same chassis in their latest XC Cube models even after several years. This was my very first SFF and also my first SFF silencing project. I bought this machine nearly two years ago, and also about the same time I joined SPCR where I got a lot of helpful tips. The original thread discussing silencing options can still be found here as well as SPCR's review of a very similar model EZ65. Although after modding this system was quiet enough to be an HTPC, it wasn't quiet enough for me to put on my desk. I always felt the restrictive airflow to be a main culprit and if I could somehow remove/relocate the PSU it could be improved. Well now was the chance to see...


SYSTEM COMPONENTS
The EZ18 comes with an Nforce2 mothboard that not only had decent onboard graphics (for it's time), but also the Soundstorm chip that encodes any PC audio (regular stereo) into digital audio (SPDIF 5.1 signal) in real time. This was perfect as an HTPC as I had the audio connected to my home digital receiver with a 5.1 speaker setup, and allowed DVD audio streams as well as all PC audio (TV signal, MP3s, Multimedia presentations, etc) to be piped through the same digital connection.

The system components include:
- Athlon XP-Mobile 2400+ CPU running at 10x166 1.2v
- CoolerMate Ice Cube CPU Cooler w/ 80mm fan
- 2x512MB RAM
- Samsung 40GB Notebook HDD
- Samsung Combo Optical Drive
- Compro PCI TV Tuner
- 220W AOpen PSU (w/ PFC) modded with Adda 80mm fan
- Zalman 80x15mm intake fan
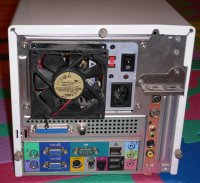
Here's a look at the system before putting in the PicoPSU.
I previously modded the original PSU, putting a quieter fan onto the outside.
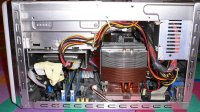


With the design of this chassis, hot air is drawn out through the CPU cooler to the vent on the right side of the case (facing you in this photo). The stock cooler was a flimsly aluminum heatsink, and trying to find a suitable sized replacement heatsink that blew sideways in the right direction was very difficult. I was fortunate to find the CoolerMate Ice Cube that was copper based and even had heat pipes (not so common back then). I actually had to ask someone to help me buy this from Germany. It was a little large (the stock cooler only used a 70mm fan) and I had to cut part of the drive cage to get it to fit. Also the tight spacing of fins are not ideal for exhausting air via this channel, but fortunately the copper and heatpipes do a decent job of keeping the CPU cool.


The already quiet 2.5" notebook HDD is suspended inside the drive cage.


A PCI TV tuner card is installed. The fan on the right is a Zalman 80x15mm fan used to draw cool air into the case from the intake vent on the left side of the chassis.


In this top view, you can see the stock PSU mounted at the back of the chassis.


PSU SWAP

Here you see the tiny PicoPSU on the right next to the stock PSU. Although the stock PSU is already quite small (even smaller than the Aria's), the Pico still makes it look like a giant.


There are only intake grills around the four edges and not the back of the stock PSU; this restricts the airflow plath for exhausting hot air out of the case via the PSU's 80mm fan. Again we hope the Pico will give the case better airflow, less heat to remove, and better power efficiency.
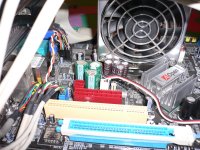


There are three tall capacitors located right next to the motherboards' ATX power connector preventing the PicoPSU to be plugged directly onto the board.


However a short extension cable works fine. The EZ18 board also requires a P4 motherboard connector which is not included on the PicoPSU. I used a molex Y-splitter coupled with a molex-to-P4 adaptor for this. I will probably solder a P4 connector directly to the PicoPSU later to reduce the amount of cables/adaptors.

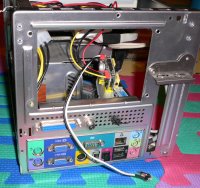


Here from the back we see the hole where the old PSU used to be. Yep that's the tiny Pico suspended inside. It's actually tied in place to the back of the chassis with a twist-tie. The Pico's 12V input plug unfortunately did not fit onto the PCI bracket that came with it, but we'll figure out a more permanent mounting solution later.


I decided to put back the same 80mm Adda fan from the original PSU.
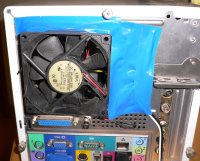


And just some temporary tape to cover up the gaps so that we get proper airflow from the original intake vents.


POWER AND HEAT
So how did the Pico perform? Well in terms of power efficiency I was amazed. With the stock PSU the AC power draw measured from the power outlet was 70W idle and 85W under Prime95. With the PicoPSU, idle was reduced to 52W and under Prime95 65W. That's a 25% difference or a reduction of 18-20W; a much bigger difference than we saw with the Antec Aria PSU and also the Tagan ATX PSU. I guess the efficiency of the stock AOpen PSU is pretty poor, at least at these low wattages. If we assume 75% efficiency for the Pico, then the stock PSU would be at a horrible 57%.


Note: I later discovered in my measurements I was actually calculating Apparent Power and did not take into consideration Power Factor.

However for temperatures the difference was not as big as what I expected. The three fans in the system are controlled via PWM using Speedfan and settings kept the same.
- CPU 80mm fan = 15% (approx 1700rpm)
- Zalman 80x15mm intake fan = 3% (no rpm reading)
- PSU 80mm fan = 20% (no rpm reading)

Temperatures with the stock PSU under IDLE/PRIME95 and room ambient of 27C.
- CPU = 43 / 48
- SYS = 45 / 48
- HDD = 35 / 34

Temperatures with PicoPSU.
- CPU = 41 / 46
- SYS = 43 / 47
- HDD = 34 / 34

The CPU/SYS temps were lowered by only roughly 2C, and the HDD temp remained pretty much the same. I would have thought with the 20W reduction, plus the additional heat that has been moved out of the case to the external AC/DC adaptor, that the system would run much cooler.
However the airflow setup is probably still optimized for the original configuation with the stock PSU, and not taking advantage of the now excellent exhaust via the rear fan. I can probably replace the CPU cooler and use the CPU vent as an intake instead. With the Pico now there are many new options to rework the airflow in this SFF to perform quietly. I will have to take some more time to experiment and will post back...

Goto AOpen XC Cube hushed

Back to Pico Psu and PW200m DC-to-DC Power Supplies


Read more!


A8NVM-CSM Aria Update

MULTIMEDIA BRACKETS

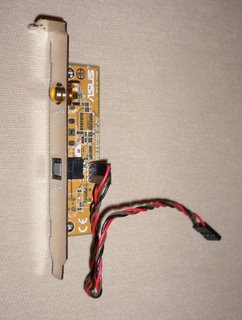
Finally received the SPDIF audio and video connector brackets for my Asus A8NVM-CSM motherboard. It's a real mystery why Asus didn't bother including these brackets with their "multimedia" motherboard, as without these the digital audio and video out functions of this motherboard become unusable. The local Asus dealer does not carry these accessories either, go figure. Fortunately I had some friends travelling to Taiwan and was able to pick these up. Yes having friends travelling to many countries is always helpful to source hard-to-find PC components, especially uncommon silencing parts, but I believe most people have trouble understanding the silent PC enthusisat. Everytime someone helps bring back a component they ask "What is this for? You mean it makes your computer run more quietly?!?" and they have this funny look of disbelief as if you might be pulling their leg.


BIOS UPDATE = LOWER TEMPS
Well I originally purchased my Asus A8NVM-CSM with the Aria as a replacement for my dated HTPC, and now with these brackets I could finally get started. I took out the 7800GT high-end graphics card as I wouldn't be playing any games on my HTPC. Now with only one 92mm CPU fan and one 120mm case fan (both running at lowered speeds with Speedfan), the system was pretty quiet and perfectly suitable for HTPC use. Regarding CPU temperatures, thanks to Steerpike and Ersa's post I discovered that the older BIOS for this board was reporting a significantly higher CPU temperature. I updated my motherboard BIOS from version 0601 to 0702 and discovered this was indeed the case. The CPU and "NB?" readings immediately dropped 8C under the exact same conditions. I compared this both at idle and under load with the same results. The MB temperature was unchanged. Although these readings are only approximate temperatures to begin with, the fact Asus adjusted this in their newer BIOS leads me to believe the newer readings should be more accurate. In the back of my mind I was always wondering why my Opteron was idling so hot even when undervolted to 0.8v 1Ghz.

A NEW DVD BURNER
I recently picked up a LG GSA-H10N DVD burner for under $40. Prices of DVD burners have come down significantly, I guess in anticipation of Blu-ray and HD-DVD. It's a fast 16x DVD burner (10x DL+R, 8X RW+R) and also has the ability to write DVD-RAM at 12x. Originally I thought of putting this in my main rig to backup data, as my thinking is DVD-RAM format will be more reliable for data. However this optical drive is perfect for the Aria, and much better than the ASUS DVD-ROM I had previously installed.
In addition to being shorter in length (allowing more space in the tight SFF case), the eject button matches the Aria's front panel button perfectly (for the Asus I had to tape on some extra padding to get good contact). The eject mechanism is also much more polite than the Asus, there is a very short pause after eject is pushed before the tray comes out smoothly, unlike the Asus tray which will shoot out immediately and roughly at high-speed; I am always startled by this and have to make sure I get my hand out of the way quickly. The LG also works nicely with Nero Drive Speed which allows the spin speed to be slowed down (ie made quiet) when playing back DVDs and CDs.

MORE PHOTOS OF THE CPU COOLER
No further changes were made here, just a few close-up shots of the Thermaltake Silent Pipe CPU heatsink and Silverstone 92mm fan attached with twist-ties.


Here you can see the fan is actually elevated from the heatsink by a tiny white foam washer (taken from a pack of CDRs).


HARD DRIVE SEEK NOISE
The fan noise level is quite acceptable as a HTPC, however the hard drive seek noise is very loud. I am using a Hitachi T7K250 250GB 7200rpm/8MB cache, two-platter SATA2 HDD. A notebook drive would probably make a better choice, but I was hoping the Aria case would allow me to take advantage of larger capacity of a regular 3.5" drive. There should be just enough room to suspend the HDD which should reduce the seek noise, also turning on AAM (Automatic Acoustic Management) should help with some minor trade-off in performance. However why not give my recently acquired SmartDrive 2002C enclosure a try.
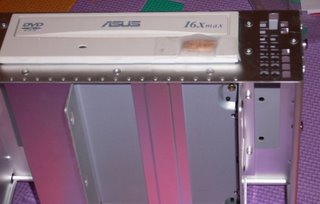
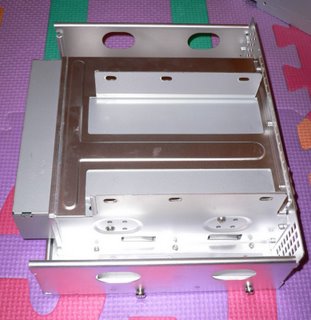
The drive cage of the Aria has three places for mounting a 3.5" HDD. The main spot is oriented horizontally, directly under the optical drive. The second and third are mounted vertically at the sides of the of optical drive. The side mounts are too narrow to fit the Smartdrive 5.25" enclosure, however it could potentially fit in the mount under the optical drive. One side of the cage's two mounting plate needs to be moved, but that can be easily bent down and out of the way.

Unfortunately, the vertical clearance is not enough to fit the Smartdrive unless the CPU fan is removed. Bluefront known at SPCR for his extensive and elaborate silent PC modding actually had a similar idea of using a PW200M inside an Aria case which he details in this post. He works off positive airflow (using the rear 12omm fan to draw in air instead of exhaust) and ducts the air to a fanless XP120 CPU heatsink. His duct idea is very nice, and even manages to mount a notebook hard drive a copper plates as part of the duct wall. I originally thought of using my XP120 heatsink as well, unfortunately the CPU socket on the A8NVM-CSM is too close to the edge and would not fit such a wide heatsink. With some clever ducting, it might still be possible to run a fanless CPU heatsink, but I think I will give such a project a miss for now as the Smartdrive enclosure was intended for my larger main rig.

AN INITIAL TEST OF THE SMARTDRIVE
But let's see how well the Smartdrive performs in anycase. As it will not fit inside the Aria case, I will have to test it outside.
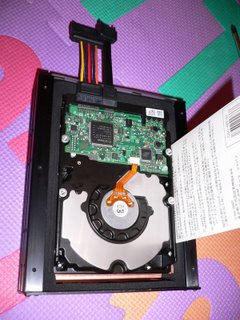
After removing the bottom plate of the enclosure, the HDD slides in between two copper plates that run along the sides of the enclosure. The foam padding pushes against these plates so that it is a very tight fit for the HDD; I used a piece of cardboard to help wedge/slide in the HDD (seen in the photo here). The SATA and power connectors were easily attached and run out the rubber lined back opening.


Oops, I forgot I was using the PW200M which doesn't have a SATA power cable, and I did not want to add a molex-to-sata power adaptor to keep cable mess to a minimum. Hitachi HDD conveniently come with both SATA power as well as molex power connectors allowing the drive to be powered by either connector. Fortunately removing and reinstalling the bottom plate and it's six screws was no big deal.


Oops again. How silly; for those observant readers you'll notice I disconnected the SATA data connector instead of the SATA power connector! When the large plug didn't match up to the SATA cable from the motherboard I actually had to pause and think why... it's getting late.
Ok opening and reclosing the bottom plate one more time, finally third time is a charm.


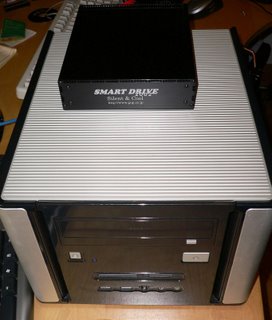
Here it is sitting on top of the Aria. First temperature-wise, the drive idled around 40C with an ambient room temperature of 27C. This is very similar to the 39C temperature of the drive when installed inside the Aria case. We should keep in mind that although the air is warmer inside the case, there is also some airflow whereas sitting outside the case there is basically none. Running Sisoft's HDD bench continuously maxed out the drive temperature at respectable 43C and as soon as the bench was stopped, drive temps dropped immediately; this suggests that the Smartdrive was effectively transferring heat away from the HDD. The Smartdrive was also warm to the touch.

How about noise? Well the Smartdrive certainly did it's job of dampening the seek noise, but unfortunately it was still clearly audible. Even if mounted inside the case, I believe the seek noises would still be audible although the sound should be quite faint.
I put the Smartdrive on a folded piece of soft packing foam to make sure vibrations from the enclosure weren't being resonated onto the Aria. The seek noise did sound very slightly fainter, but not a significant difference. I could clearly feel the vibrations of the HDD, but with the foam and inertia from the heavy Smartdrive, this must have been dampened (the Hitachi drive does tend to vibrate quite a bit despite being only two platters).

In terms of the spinning noise, this was audible but a smooth tone that was not very loud. At around four feet, I wasn't able to make out the sound anymore (all fans turned off in a very quiet room). I am pretty sure inside a computer case this level of noise would be practically inaudible from more than two feet away. However I did notice if I placed my hand over the enclosure (very near to it but without touching it) the spinning noise became significatnly louder (a whooshing sound). I guess the noise was somehow echoing off my hand and the enclosure, so not sure how this interaction of noise would play up inside a PC case?
In anycase this is just a very initial test, I will post a better evaluation when I have a chance to install it in my main rig. From the initial testing however, I would summarize that the Smartdrive 2002C seems to do a very good job of keeping the drive cool, will probably quiet the spin noise of a relatively quiet drive to near inaudible levels, but will only be able to dampen and not silent loud seek noises.

Goto PW200M and a 7800GT
Read more!


Thursday, April 20, 2006

SmartDrive 2002C

Many silent PC enthusiasts have heard of the SmartDrive enclosure for silencing hard disks, but because of it's expensive cost and limited availability not many have actual experiences with one. The SmartDrive has been produced by the Japanese company www.gup.co.jp for many years now, who claims over 60,000 units shipped outside of Japan. Recently stumbling onto their Japanese website, I discovered their retail/online store was selling their 2002C (copper model) for 5480 yen, or approximately US$50. It's still not cheap, considering you can get a 80GB HDD for the same price, but much less than the $70 or higher price seen at US/European online retailers. It was only after I made my purchase that I discovered apparently there was some kind of special promotion (as I don't read Japanese) and the normal price seems to be around 8000 yen closer to the US/Europe price. Needless to say I was happy that I just by chance lucked out to get the special price (maybe I should have gotten two...)


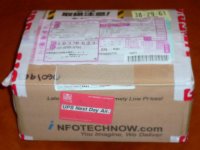
I do not live in Japan, but happened to have a friend visiting Tokyo who helped me with the purchase. The package came nicely wrapped and delivered by UPS Japan.


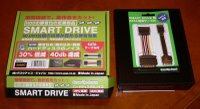
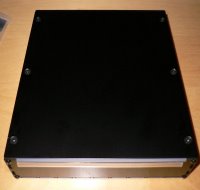
Here the SmartDrive is taken out and placed next to it's box. It has a nice anodized black aluminum finish and is actually a hefty weight. I purchased the SATA cable extender set for an extra $6.


Although it is possible attach a system's cables directly to the HDD, using the extension will make it possible to detach the HDD without having to open up the enclosure. However I discovered the extra $6 was not necessary as a set of both SATA and ATA extension cables is already included.


The bottom-side of the enclosure with the six screws used to hold the bottom plate in place.


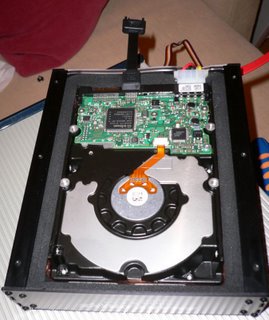
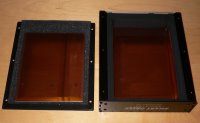
Opening up we see there are two large copper plates inside the black alumnim enclosure. Also a heavy foam lining along the edges makes for a tight seal.


The enclosure has the form factor of a 5.25" drive, so mounting it inside a SFF will probably be quite difficult unless one is willing to sacrifice the optical drive. But we'll see if there is any chance to fit it inside the Aria case. I plan to test this enclosure and will post how effective it is in both dampening the noise as well as cooling the HDD.


Read more!

Saturday, April 15, 2006

Individual Processor TDP / TcaseMax

Starting with it’s Revision E cores, AMD has begun programming individual chip’s TDP rating into their processors. In the past AMD used a conservative maximum TDP rating that was often the highest theoretical TDP across several models and all production batches. TDP was often used to compare how power hungry certain brands/lines of processors were against others, but now with this chip specific TDP, there is a way to quantify the sample-to-sample production variance and determine how a particular chip will perform in terms of power consumption. This becomes much more interesting to overclocking and silent PC enthusisasts. A low TDP chip will consume less power leading to less heat that needs to be dissipated (from both the CPU as well as the PSU) which means it can be cooled more easily or quietly. Conversely a higher TDP or a chip's ability to consume more power, is also speculated to indicate a better overclocking chip.


The majority of the information is compiled from AMD Opteron Processor Power and Thermal Data Sheet (pdf) and AMD Athlon 64 Processor Power and Thermal Data Sheet (pdf). Any clarifications, corrections, and new information is welcome.


TDP – WHAT IS IT?
TDP stands for Thermal Design Power, or also called Thermal Dissipation Power.

In AMD support forums we find this definition:

This is the maximum theoretical amount of power (in Watts) that a processor may consume and therefore dissipate as heat. TDP-values are crucial when it comes to designing cooling solutions as they specify the maximum amount of power (=heat)
that a cooling solution must be able to dissipate.Note that
AMD's TDP-values are absolute maximum, i.e. 'worst case' ratings.During normal operation, an AMD Processor will typically not reach its specified TDP. Other manufacturers may have a different definition for their TDP-values, e.g. they might give typical instead of absolute maximum ratings, i.e. they might specify the amount of power dissipated during normal operation (='typical' conditions).

In AMD’s Processor Power and Thermal Data Sheets (APPTDS) we find:

Thermal Design Power (TDP) is measured under the conditions of Tcase Max, IDD Max, and VDD=VID_VDD, and include all power dissipated on-die from VDD, VDDIO, VLDT, VTT, and VDDA.


TDP – HOW TO FIND IT?
Unfortunately the individual chip’s TDP is not indicated on the exterior or packaging of the CPU. It is however programmed into the chip as a TcaseMax value. From APPTDS


Tcase max is the maximum case temperature specification which is a physical value in degrees Celsius. This value is programmed into Rev D and later processors..
Tcase max is programmed during device manufacturing with part-specific values for Rev E and later processors with 'Variable'
indicated by the Case Temperature OPN character, and can be any valid Tcase max value in the range specified for the corresponding OPN

How is TcaseMax related to TDP? In APPTDS we find a series of thermal profile tables that translates Tcase Max to TDP based on the specific thermal profile of the processor.


The thermal profile is used to define the relationship between Tcase max and devicespecific Thermal Design Power for Rev. E and later processors with “Variable” indicated by the Case Temperature OPN character.

From the above definitions, it seems that during the manufacturing process, AMD will load each chip at the rated voltage/speed and measure the maximum case temperature and/or power consumption to obtain TcaseMax/TDP.

So how to read the TcaseMax from a Revision E or later CPU? A nice little program called AMD64 TcaseMax will read this value off your chip and automatically translate the value based on APPTDS tables. This handy utility can be downloaded here.


TDP – CLARIFICATIONS
Will the TDP rating be affected by the actual clock or voltage the CPU is being run at? No, TDP is measured at the rated voltage, max P-state (or rated/stock clock speed), and assume under maximum load so regardless of your clock speed or voltage, the TcaseMax utility should give the same TDP. The actual power consumption of the chip however will vary with changes in voltage and clock.

So does this mean that a dual-core Opteron 180 with a chip rating of 1.35v, 49C TcaseMax, and 35.0W TDP consumes only 35.0W when running at stock speed of 2.4Ghz under CPU load? Less than half the power of a slower dual-core Athlon X2 3800+ with a smaller L2 cache rated at 1.35v, 71C TcaseMax, and 89.0W TDP running at 2.0Ghz?! Even nearly half the power of a single-core Athlon 3500+ with a TcaseMax of 65C, 67.0W TDP running at 2.2Ghz? Well if our interpretation of TDP is correct, then yes that is exactly what it means.

Borrowing numbers from SPCR’s Desktop CPU Power Survey we see various A64 CPU’s with their TDP read by TcaseMax and their actual CPU power consumption. Although the measured CPU power draw does not exactly match up to the rated TDP, it is within -2.3 to 13.2W. The relative ranking in terms of measured power consumption matches the TDP rating except for the 3500+ Venice which has a slightly higher TDP rating by 1.4W than the X2 3800+ but measured in at 4.2W less. Considering that the motherboard used may not have been giving the exact rated voltage, the temperature/cooling differences of the CPU, as well as power measurement error, overall it seems that rated TDP does give a very good idea how the chip will perform in terms of power consumption.

In addition, even with all CPUs idling at the same clock and voltage (1Ghz 1.1v), we see the ranking of measured power consumption also matching that of the TDP. Again the only exception being the 3500+ Venice, which this time is drawing slightly more power than the higher TDP X2 4800+, but again this could easily be due to the factors mentioned above.


How does TDP affect the ability of a particular chip to be overclocked or undervolted? Well that is a question that unfortunately APPTDS does not seem to address. Any input that can help answer this question is welcome.


TCASE MAX IN DETAIL
Studying the APPTDS we find several figures that seem to determine the processor’s TDP. Each model will have a Thermal Profile that gives a specific Thermal Resistance (case to ambient) in C/W as well as a Tcase Max range. In addition there is a Local Ambient Temperature or Tambient. Plotting the various the Processor Thermal Profile tables, it seems that the relationship between Tcase Max and TDP is linear and can be roughly calculated using the following formula:

TDP = ( TcaseMax – Tambient ) / Thermal Resistance


Each series in the graph represents a different specific Thermal Resistance (C/W). We can see AMD slightly rounded down the highest TDP for some profiles. Most processor profiles are based on a Tambient of 42C, except the FX series which has a Tambient of 40C.


As we can see that different models have different Thermal Profiles and in general lower Thermal Resistance will give a higher TDP for the equivalent Tcase Max (and vice-versa). Will this give us any clues which models will have lower or higher TDP? Let’s look at a summary of APPTDS Thermal/Power Specifications tables. I’ve only included the Rev E chips, and this is per the last update of November 2005 for the Opterons, and March 2006 for all other models. In addition to giving the Thermal profile/Thermal resistance, the voltage range (VID_VDD) and TcaseMax range are also given for each CPU model/revision.


** Data points corrected as these seemed to be typos on the APPTDS.

Before we start salivating at the 20.6 TDP (for silent PC enthusisasts) or the 110.0 TDP (for overclockers), please keep in mind this is just a general range given in AMD’s specs and does not mean that there are even any chips that fall on these extremes. However we do see that in general the dual-core chips have a lower Thermal Resistance of 0.20, notably the higher speed X2s and Opterons. This would suggest a higher TDP, but from user’s posting on the TcaseMax utility forum and on SPCR, it seems most dual-core Opterons have an exceptionally low 35.0W TDPs although one Opteron 165 also had a rating that went up to 105.0W. It seems that it would be too soon to draw any generalizations with the limited data on actual chip TDPs.

However it is interesting to note we do find an Opteron Thermal Profile with a very high Thermal Resistance of 0.95C/W and an extremely low 7.4W-30.0W TDP range, but alas none of the listed models have this profile. The lowest TDP range can be found for the s940 dual-core 260/860 series OSAxxxFAA6CB/CC with 0.51C/W Thermal Resistance, 1.15/1.20v rating, and 13.7-55.0W TDP range; as well as the s940 single-core 240/840 series OSAxxxFAA5BL/BM with 0.53C/W Thermal Resistance, 1.35/1.40v rating, and 13.2-54.7W TDP range.


AND SOCKET 754 PROCESSORS
None of the s754 processors seem to have the individual chip TDP ratings despite having also moved to Rev E. However we can look at their maximum TDP rating just for comparison purposes.

The Rev E Athlon 64 3000 (ADA3000AIK4BX) as well as the Sempron 64s both have a rating of 1.4v, 42C Tambient, and 0.45C/W Thermal Resistance. The TcaseMax is 65C giving a 51W TDP for the Athlon, and TcaseMax of 69-70C giving a 59/62W TDP for the Semprons. Again this is the overall maximum TDP and not the TDP of the individual chip which will likely to be lower. The high Thermal Resistance, however does suggest that these chips in general should have lower TDPs.

The Turion (MT only, no ML) are also included in the APPTDS. The Thermal Resistance of these chips are amazingly high at 2.00-2.08 C/W. However instead of TcaseMax we find a very high TdieMax of 95C, and also the Tambinet is a lower 36C. Possibly this is because Turions come without the heat spreader found on other AMD64 processors. The maximum TDP is listed at 24-25W. Using the formula from above we get slightly higher figures of (28.4-29.5W).


Read more!

Thursday, April 13, 2006

No Batteries 2

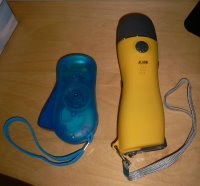
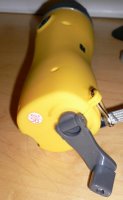
The other day, I stumbled across an improved version of the battery-less flashlight. This yellow version has quite a few improvements over the smaller blue version I found before, and costs only very slightly more priced at US$4.50.


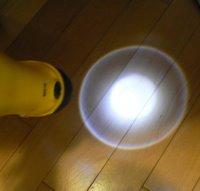
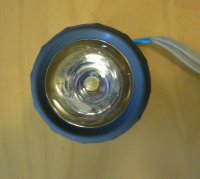
First the beam of light is very focused and bright. It also remains bright without much noticable dropping off even after a few minutes. The second picture was actually taken on a brightly illuminated part of the floor.

The brighter light is achieved with one large LED in place of the three smaller LED's used in the past model. This probably also improves it's energy efficiency.


Here compared with the older version, you can see the more focused and brighter beam of the new version (although both lights were angled slightly differently, the perceived difference is quite similar to the photo).


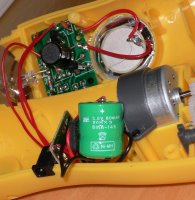
Inside we find a larger rechargable battery rated at 3.6V 80mAh (8mA-14h) and indicated as a nickel metal-hydride type. This is twice the capacity of the older version.


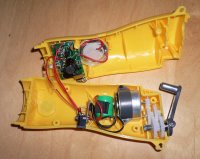
This version now uses a hand-crank mechanism to turn the dynamo. Less effort is required to turn this crank compared with the pressure trigger. One slight design fault, the crank can be turned in either direction, but power is only generated when turned clock-wise. However the arrow indicating the correct direction is actually on the back-side of the grey lever and hidden from view.


Inside we see a set of gears translating each crank into multiple turns of the smaller dynamo.


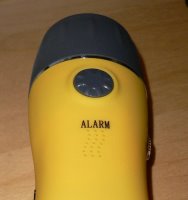
An alarm or siren is one of the new features. The packaging actually claims 650dB, but I'm pretty sure it's an exageration even though it is quite loud.


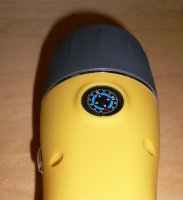
A little compass is also included incase you get lost.


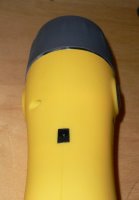
And a little jack for plugging in an optional (not included) cable to "charge your mobile phone". Once a plug is inserted into this socket, it will automatically turn off the LED and create a direct link between the dyanamo and the socket. Testing it with a voltmeter, the output is variable depending on how fast you turn the crank, but limited to a maximum of approximately 5.5-6.0v (it's a little hard to hold the voltmeter probes and crank at the same time).


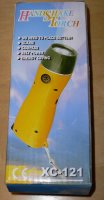
The packaging, with it's interesting wording. "Hand Shake Torch" even though the mechanism is a hand cranked/turned dyanmo.


I was very happy with how significant the improvement was in brightness and duration of the beam. For only an extra $1 over the previous model, plus a list of extra features (although usefulness of these functions maybe limited to hikers/campers) make it a very good value.

Back to No Batteries


Read more!