Linux on the Wall
 My experiences building a small, low cost, low power consumption, diskless, linux data collection terminal left me with many thoughts to try and build a small silent linux PC. Certainly there are plenty of mini-ITX systems out there, but most tend to be somewhat pricey compared to say a regular desktop system. With the PC Chips VIA C3 800 mhz budget board, being only 5cm wider than a mini-ITX board, let's see what can be done.
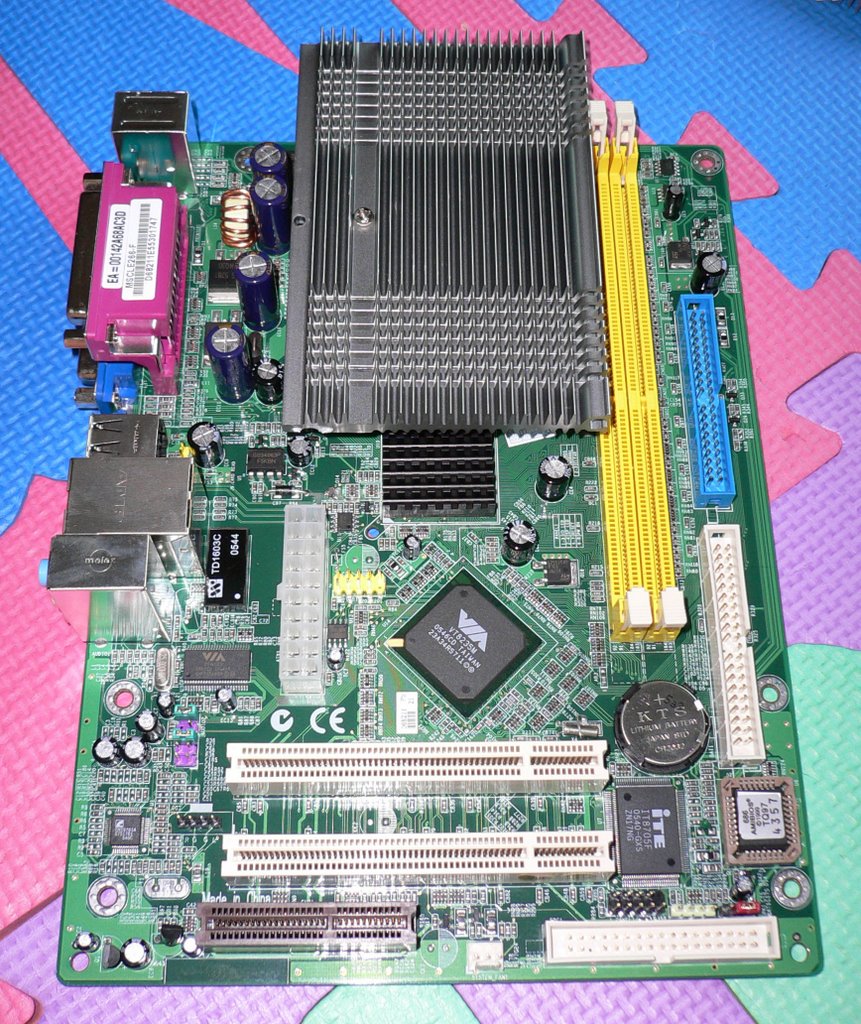
 This time around I found a Matsonic version of the PC Chips board. Besides the different color scheme (I actually prefer this traditional green to the red of the PC Chips board), and the Matsonic branding, everything else on the board is identical to the PC Chips M789CG. Even the contents of the manual is the same.
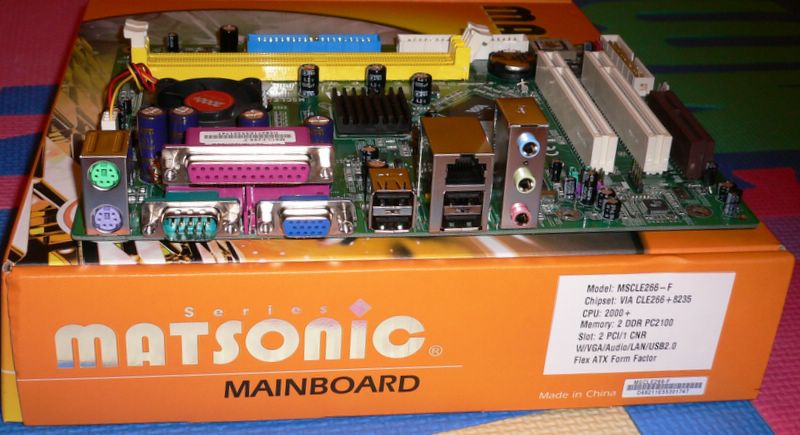 The Matsonic model number is MSCLE266.
CPU HEATSINK
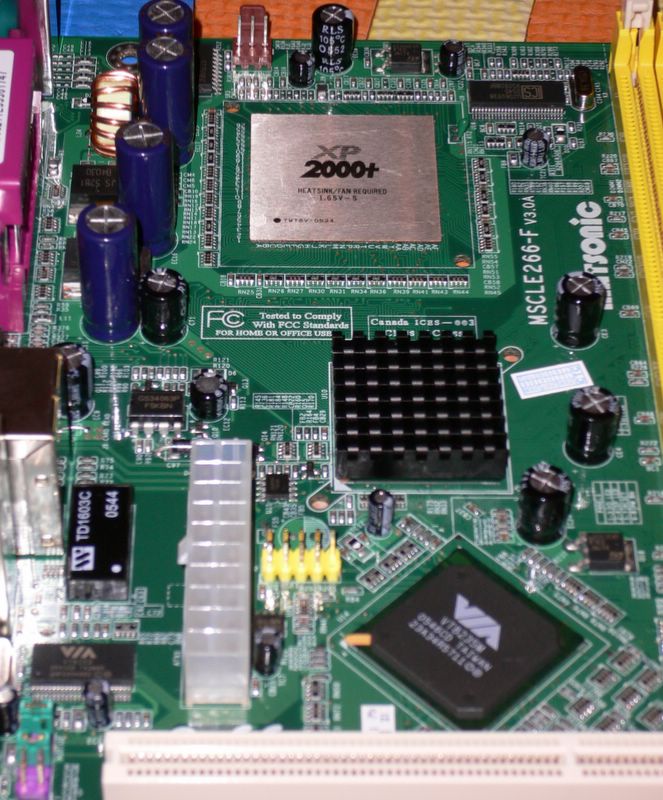 The first step is to remove the noisy 40cm CPU fan and see if we can find a sutiable fanless heatsink replacement. I was able to remove the stock CPU heatsink fan without too much trouble. Beside the two plastic push pins, the heatsink is stuck to the CPU by a piece of double-sided thermal adhesive tape; wiggling/twisting and pulling up with my fingers did the job. I suspect removing the heatsink before turning on the system helps (the heat probably makes the tape stick even more), however please remember to take care as the CPU/board can be damaged and you may void your warranty.
 The heatsink mounting holes are placed 60mm diagonally across from each other similar to northbridge heatsinks. The row of capacitors just next to the CPU also must be taken into account. Searching what was available in the local stores, I came across this Zalman, fan shaped northrbidge cooler, let's see how well it works.
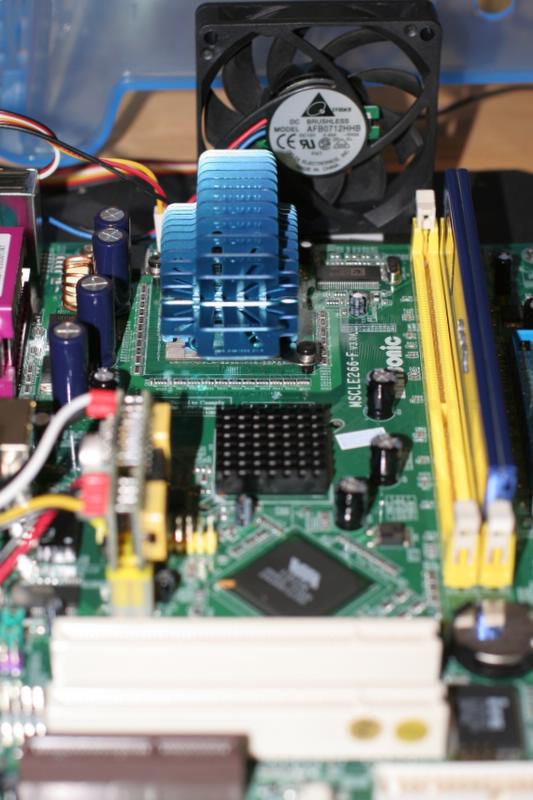
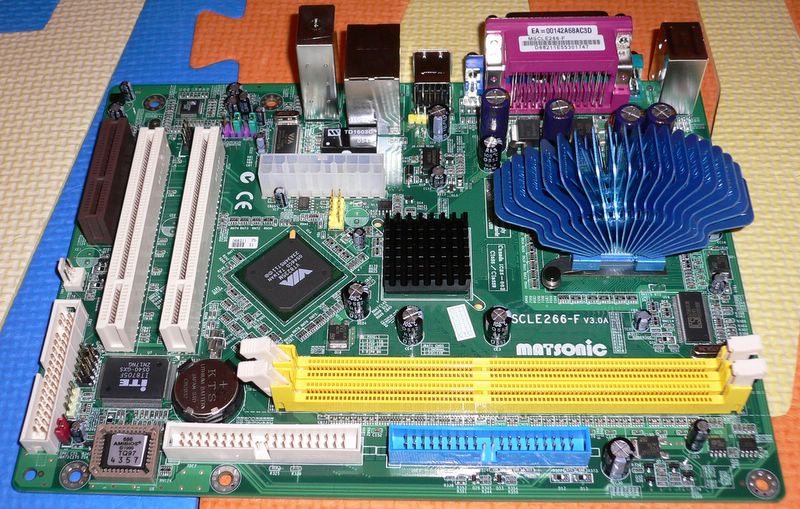 The Zalman has two adjustable flanges that jut out from opposite corners of the heatsink, and had no problems fitting the mounting holes. Also the despite the wide fan-type fins, it is actually quite narrow along the other axis so there was no problem with the caps.
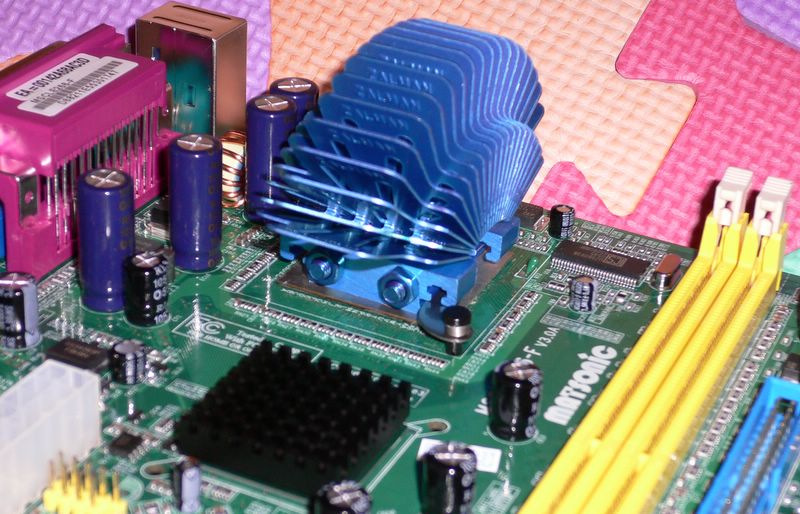 The base of the Zalman however was not as large as the CPU die and did not cover it completely, but there should be sufficient contact for proper heat transfer. Arctic Silver was used for the thermal compound.
With the motherboard placed in the open on top of a desk, an ambient of 29C, the temperatures were as follows:
STATE = CPU - MB - HDD
IDLE = 44C - 35C - 34C
PRIME95 = 73C - 37C - 36C
74C is a little bit on the hot side, however it should still be within the C3 CPU's operating range, and the system remained stable. However temperatures would get hotter enclosed in a small case, let's see if we can find a larger heatsink that will fit this board and provide better cooling.

I had an old Zalman fanless VGA heatsink with similar adjustable mounting flanges which also fit on the board. It has two large aluminum heatsinks that sandwich the VGA card and are connected by one heat pipe. The mounting block is shown on the CPU, the large heatsink plate then attaches to this with the heatpipe held in between.
Here is the heatsink plate, it has quite a large surface area and is more similar to the stock heatsink seen on fanless VIA mini-ITX boards. Unfortunately it extends over the RAM slots, and about 2 cm would need to be cut off the plate to make it fit. For testing though, I did manage to shift the plate a little to the left to clear the slots, using only one out of the two screws to affix the plate to the mounting block. The side view below probably is easier to understand. The proper mounting position for the plate would actually slide the plate left just covering both RAM slots. The way it is mounted here is not ideal as the contact surface between the mounting block and heatplate is reduced (due to the indentation for heatpipe and other ridges).

However when the CPU was running, the plate got hot enough to suggest there was sufficient area for heat transfer. Unfortunately the CPU temperatures were no better than the Zalman fan-type NB heatsink, and the motherboard temperature actually ran 1-2C hotter probably because the heatsink covered much of the board. Despite it's larger size this VGA heatsink did a worse job, maybe if the heatpipe was installed and the second plate also used it would run cooler. Also the heatpipe would allow the second plate to be connected to an alumnimum case for even better heat dissipation, but for now we'll go back to the fan-type NB heatsink.
Adding a system fan would probably be safer so I tried several different fans with the open board, all placed next to the CPU blowing horizontally across the board. The temperatures under Prime95 where all quite acceptable.
Papst 80mm @ 7v = 46C - 37C - 36C
AMD stock 70mm @ 5v = 45C - 35C - 35C
Noname 50mm @ 5v = 54C - 36C - 36C
COMPONENTS
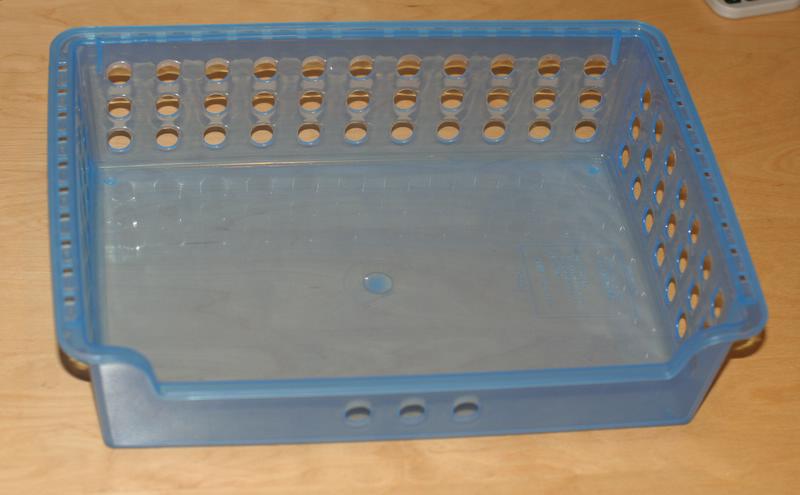 I spent a few trips looking through the grocery store, stationery stores, as well as the local dime stores for containers of suitable size. I considered cookie tins, food gift boxes, tupperware type containers. Eventually I decided to try this plastic A4-sized paper tray first. It's a bit larger than the motherboard, and a little tall, but it's tranlucent blue material doesn't look too bad (plus matches the blue Zalman heatsink), it has built in vent holes, and the shape looked quite suitable to fit the system without much modification. If the system ran well, I could always try other smaller containers.
 For mounting the motherboard, I cut a piece of black cardboard to the shape of the plastic tray. As the tray is both wider and deeper than the MB, I decided to push the MB all the way to the front so as much of the connectors/peripherals connected to the rear I/O port would remain within the case for a tidier look.
 I used two nuts to space the motherboard up from the base board. An additional nut on the other side to secure the screw.
 I just happened to have a stick of GEIL RAM with a blue heat sink, which nicely matches the Zalman. It even has a built in temperature gauge, now it might actually be useful with a transparent case.
I attached the 70mm stock AMD fan to the base board with double-sided tape.
 Of course the Pico PSU is perfect for this system. It's a little out of focus, but it's the tiny yellow board in the lower left of the photo.
 And the last component, a Toshiba 512MB flash drive for loading the OS and saving any files/settings.
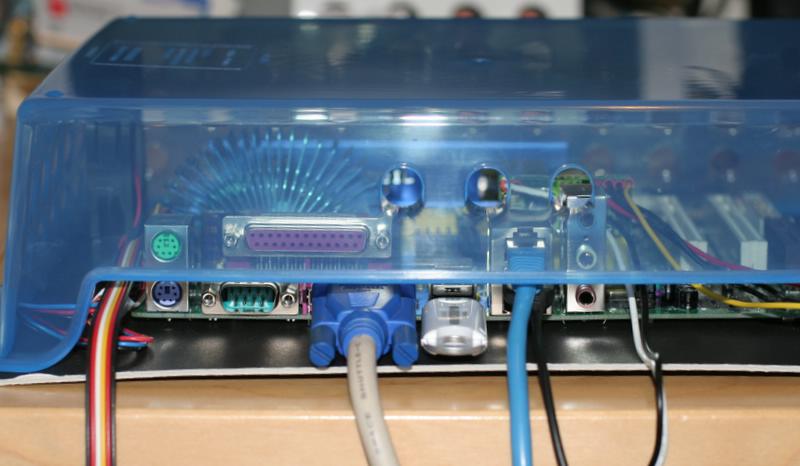 The slightly lower front side of the plastic tray makes for a nice opening that allows access to the I/O panel and a path for the cables to exit. The tray is held onto the base board with twist ties at the four corners.
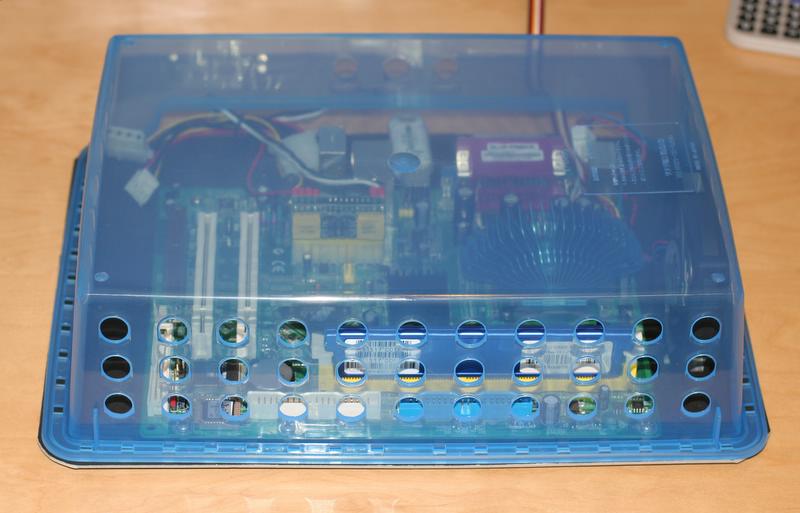 Here is the system with the cover on. I temporarily attached a hard drive so I could run Prime95 and monitor temps under Windows XP (unfortunately not yet familiar enough with Linux to setup a temperature monitoring utilitly like LM_Sensors). Under Prime95, the CPU temp was the same as without the cover, the motherboard temp was higher by 6C (41C). After being run for a while, the RAM, PicoPSU, NB heatsink all felt quite warm. Even the top of the case and bottom also felt warm. However once it was mounted on the wall, it seemed to run cooler. I was unable to measure the temperatures under Prime95 (as now running Puppy Linux), but no part of the case felt warm. With the vent holes now on top, this probably makes for much better airflow/heat exhaust compared with being placed flat (top totally enclosed).
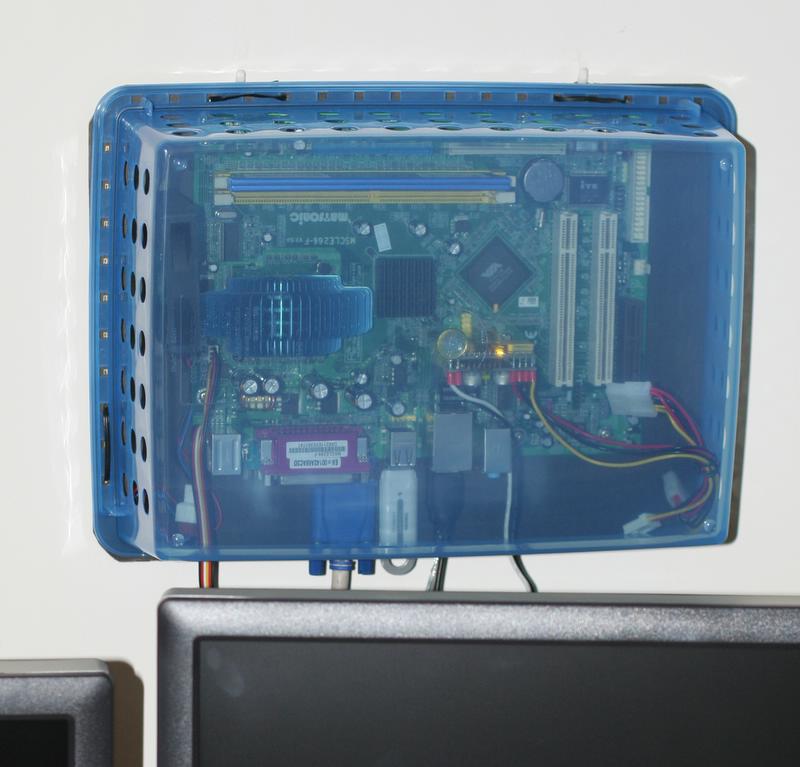
Because of it's light weight, the system is easily mounted on the wall; I used two photo frame hooks.
BOOTING PUPPY LINUX
Installing Puppy Linux onto the USB flash drive was quite simple (this was described in Small System for a Small Budget ). The bootup time from the flash drive took about 1 minute and 20 seconds from the time the power switch was pressed.

Here it is driving my Dell 24" at 1600x1200 on the left (the right screen is connected to my main rig). Despite it's tiny 60MB size,Puppy Linux is a surprisingly usable OS (with the basic functions of browsing, email, chat, word processing, etc. and Open Office, Skype, among other programs can be added). Although certainly not fast, the app loading, screen refreshing times are reasonable.
 Power consumption running Puppy Linux, 17-39 VA total power measured from the AC outlet. Assuming the AC/DC is working at a PFC of around 1, that would mean 17-39Watts.
One problem though with Puppy Linux is that it has no option to suspend the system, meaning you will need to power off the system instead. Also after shutdown, it does not automatically power off the PC either, you have to manually push the power switch which is a minor hassle. I suspect there should be some utililities/tools in Linux that would remedy this. Leaving this PC on all the time is not too bad with only 17W consumption, but still being able to suspend and wake from keyboard would be better.
And how about noise. Well without any hard drives, the system is certainly very quiet. The stock AMD 70mm fan is the only source of noise, and although very quiet when run at 5v, a very fain hum is still audible in a very quiet environment. As the system runs relatively cool, finding a quieter fan should not be too difficult to make this system practically inaudible.
SUMMARY

Total Cost:
MB+CPU = $55
512MB RAM = $50
PicoPSU + 60W AC/DC adaptor = $60
Toshiba 512MB USB Flash drive = $15 Zalman NB Heatsink = $10
Plastic Tray + Cardboard= $5
70mm fan = $5
Puppy Linux = $0
TOTAL $200
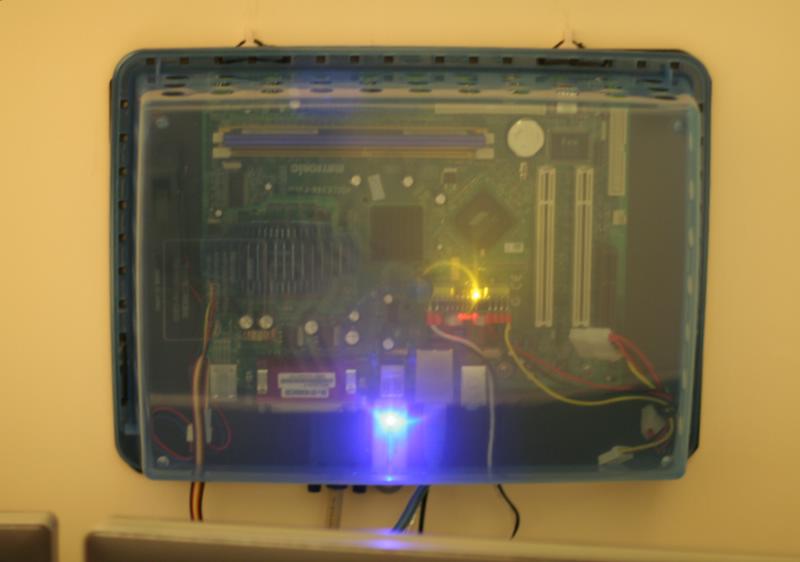
This makes a nice small and quiet budget system for running/learning linux and performing light computer work in near silence. Mounting it on the wall means no extra floor or desk space is needed, and depending on your tastes it can also make for a nice piece of techno-wall-art or simply an interesting conversation piece. In the current setup, the PicoPSU has an always on green LED, an additional red one when powered up, and the flash drive a blue LED when accessed; RAM with LEDs (like Ballistix Tracer) could also be added to show the true working of the PC, or otherwise cosmetic case lighting added if that's your fancy.
 What's next, well actually the cables inside are still a little messy (the unused molex/floppy cables from the PicoPSU). Also there are quite a few cables running down from the system (VGA, lan, keyboard, mouse, power, sound, fan controller) and although it is hidden from view behind the LCD, it would be nice to have a cleaner look. Changing to USB wifi, wireless keyboard mouse (with small dongles), and connecting the fan directly to 5v will help. Possibly replacing the base board with a more permanent alumnimum base. I've never been much of a fan for LED lighting, but for this case I am somewhat tempted...
 Also how about a linux box in a cookie tin, this one just fits the motherboard with a little room to spare...
Go to Small System for a Small Budget
Go to Tiny Motherboard with 5W Processor for $60
posted by Mstac @ 2:37 AM
0 comments
![]()
![]()

0 Comments:
Post a Comment
<< Home